Mastering Fastener Selection and Installation for Professional Tool Mounting Security
Introduction to Secure Mounting
Choosing the right secure tool mounting fasteners is the foundation of safe, reliable transport. Tools move, roads shake, and loads shift; the fastener system must handle static weight plus dynamic forces and vibration without loosening or deforming the substrate.
Start with load and substrate. Estimate the total mass of the tools plus the mounting plate and consider worst-case shock loads (2–3x static weight in a vehicle). Identify the base material: thin van sheet metal, aluminum extrusion, plywood, or polymer tool boxes. Shear is the dominant load on horizontal plates; tension and pull-through matter in vertical mounts. Match the fastener and reinforcement to the weakest link—the substrate—not just the plate.
Select appropriate heavy-duty fasteners:
Bolts: SAE Grade 5/8 or metric 8.8/10.9 for steel structures; A2-70/A4-70 stainless for corrosion-prone environments. Use zinc-plated steel where corrosion is moderate and cost matters.
Nuts: Nylon-insert locknuts or all-metal locknuts for vibration resistance; serrated flange nuts help bite through coatings.
Washers: Hardened washers to distribute load; fender washers or backing plates on thin sheet or polymers to prevent pull-through.
Inserts: Rivet nuts (nutserts) for thin sheet metal; T-nuts for plywood; channel/spring nuts for Unistrut and rack systems.
Security heads: Pin-in Torx or one-way screws to deter theft on exposed tool storage mounting hardware.
Use proven secure fastening techniques:
Favor through-bolting with backing plates wherever possible. Self-tapping screws are not the best fasteners for tool boxes carrying heavy loads.
Aim for thread engagement of 1–1.5x bolt diameter in steel and 2x in aluminum. Avoid bottoming out.
Apply medium-strength threadlocker on clean, dry threads or use prevailing-torque nuts; don’t rely on split lock washers alone.
Keep fastener heads low-profile. Countersunk flat-head screws in beveled holes prevent snags on mounting plates and tool cases; use countersunk washers if the base material is soft.
Mounting plate installation best practices:
Lay out hole patterns to align with internal ribs or structure. Maintain edge distance of at least 2–3 bolt diameters.
Deburr holes; remove coatings only where necessary for electrical bonding. Serrated hardware can penetrate powder coat for grip.
Torque to manufacturer specs; avoid “final” torquing with an impact driver. Re-check torque after initial vibration cycles.
Mark witness stripes on nuts/bolts for quick visual inspection during service.
Isolate dissimilar metals (e.g., stainless on aluminum) with anti-seize or isolator washers to reduce galvanic corrosion.
Concrete scenarios:
Van wall mount: Use M6 (10.9) bolts into steel rivet nuts with 30–40 mm fender washers behind polymer tool boxes. Add a thin backing plate inside the panel if possible.
Plywood deck: Install 1/4-20 T-nuts from below and through-bolt the plate with hardened washers and nyloc nuts.
Unistrut rack: Pair M8 8.8 bolts with spring/channel nuts; add serrated flange nuts on the plate side for vibration resistance.
By matching fastener grade, head style, and reinforcement to the load and substrate, you’ll build a system that stays tight, protects the box and vehicle, and extends the life of your mounting hardware.
Understanding Different Fastener Types
Choosing the right secure tool mounting fasteners starts with the surface you’re attaching to, the load you expect, and how often you’ll remove the setup. Different substrates—thin sheet metal, plywood/composite decks, aluminum extrusions—call for different tool storage mounting hardware. Below are the most common fastener types used in professional mounting plate installation and when to use each.
Through-bolts with nuts (machine screws/bolts)
- Best for: Plywood decks, thicker composites, steel frames you can access from both sides. - Why: Highest clamp force and reliability for heavy-duty fasteners. - Tips: Use Grade 5 or Grade 8 zinc-plated bolts for maximum strength, or 18-8/A2 stainless for corrosion resistance. Add fender washers or a backing plate under thin substrates to spread load. Pair with nyloc nuts, all-metal lock nuts, or blue threadlocker for vibration resistance. Choose button-head or countersunk hardware to keep Boco Custom low-profile plates flush.
Rivet nuts (nutserts)
- Best for: Thin sheet metal in vans, trucks, and tool box shells where back-side access is limited. - Why: Create reusable internal threads (e.g., 1/4-20 or M6) in thin material—often the best fasteners for tool boxes with 0.8–2.0 mm skins. - Tips: Match the grip range to the material thickness; large-flange, knurled rivet nuts reduce spin-out. Install with a proper setting tool to avoid under- or over-crimp. Pair with stainless or zinc-plated machine screws and blue threadlocker.
Structural blind rivets
- Best for: Permanent, high-vibration attachment when removal isn’t needed. - Why: Monobolt/Huck-style rivets offer high shear strength without back-side access. - Tips: Use where maximum reliability and low profile matter more than serviceability.
Self-tapping/thread-forming screws
- Best for: Quick installs in thicker sheet or certain aluminum extrusions. - Why: Fast and convenient when loads are light to moderate. - Tips: Pre-drill accurate pilot holes; avoid repeated removal to prevent thread wear. Not ideal for heavy loads or continuous vibration.
Wood-specific screws and lag bolts
- Best for: Plywood decks and drawer modules. - Why: Deep thread engagement and good pull-out in wood. - Tips: Pre-drill; use flange heads or washers to distribute load. For heavy drawers on Boco plates, through-bolts often outperform lags.
Secure fastening techniques that matter across all types:
Locking: Prefer nyloc or all-metal lock nuts, blue threadlocker, or wedge-lock washers. Split lock washers are less reliable under vibration.
Corrosion control: Match materials to the environment. In salty or wet conditions, choose stainless or zinc-nickel coatings and isolate dissimilar metals to reduce galvanic corrosion. Use anti-seize on stainless to prevent galling.
Length and engagement: Aim for 1–1.5x fastener diameter of thread engagement in nuts or inserts. Don’t exceed a rivet nut’s grip range.
Low profile: Use countersunk or button-head hardware where plates are flush to avoid snag points.
Example setups:
Van sheet metal: M6 stainless button-head bolts into knurled large-flange rivet nuts with blue threadlocker—clean, removable, and flush.
Plywood deck: 1/4-20 Grade 5 button-head bolts with fender washers and nyloc nuts beneath; add a backing plate for high-load modules.
Selecting fasteners by substrate, load, environment, and serviceability ensures safer, longer-lasting installs—and gets the most from Boco Custom’s heavy-duty, low-profile mounting plates.
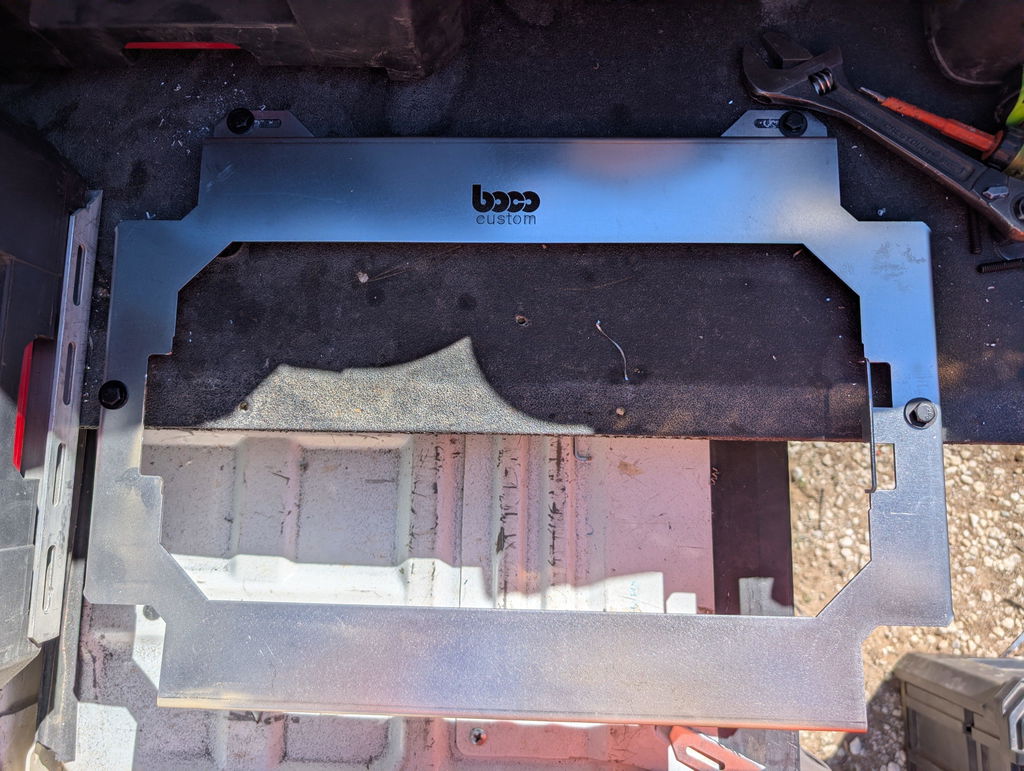
Illustration for Mastering Fastener Selection and Installation for Professional Tool Mounting Security
Matching Fasteners to Materials
Selecting the right fastener starts with the base material. Secure tool mounting fasteners must match sheet thickness, composition, and access constraints while resisting vibration and corrosion. The wrong pairing leads to pull-through, loosening, or galvanic corrosion that quietly weakens joints over time.
Metal tool boxes and vehicle sheet metal (≈0.8–2.0 mm)
Best for serviceable joints: Through-bolts (1/4-20 or M6) with fender washers or a backing plate inside the panel. Choose SAE Grade 5/8 or ISO 8.8/10.9 heavy-duty fasteners for shear resistance.
When back access is limited: Rivet nuts (nutserts/plusnuts) sized to the sheet thickness; large-flange or plusnut styles increase pull-out strength in thin walls.
Permanent installs: Structural blind rivets (bulb-tite/hemlock) spread load and won’t loosen under vibration.
Avoid relying on self-drilling screws for primary loads; they are quick but offer poor long-term clamp in thin steel.
Aluminum drawers, racks, and extrusions
Prevent galvanic corrosion between aluminum and carbon steel. Use zinc-plated steel fasteners with primer or isolating nylon/EPDM washers, or 316 stainless with isolation.
Choose large-flange rivet nuts or structural rivets for thin skins. Apply anti-seize on stainless hardware to prevent galling.
Plywood and composite decks
Through-bolt with wide fender washers or a continuous backing strip to distribute load. T-nuts work when rear access is available and you want a flush underside.
Wood screws are acceptable only for light-duty attachments; pre-drill and avoid edges to prevent splitting.
Plastics and laminates
Use well nuts (rubber expansion) for vibration damping and sealing, or rivet nuts with backing washers. Low torque is critical to prevent cracking.
Thick steel frames and brackets
Tap threads where thickness allows, or use weld nuts/cage nuts for repeat service. Through-bolting remains strongest if both sides are accessible.
Matching to your mounting plate
Confirm hole sizes and spacing from product drawings or DXF files to choose correct machine screw diameters and head styles. Button-head or pan-head screws protect coatings; countersunk fasteners sit flush when plates are chamfered for them. Recheck torque after initial compression of coatings and isolators.
Secure fastening techniques that hold up
Use prevailing-torque lock nuts (nylon-insert or all-metal) or medium-strength threadlocker for serviceable joints; combine with proper torque rather than split lock washers.
Add load spreaders: fender washers, backing plates, or internal doubler plates on thin walls.
Maintain edge distance ≥2× fastener diameter and use multiple fasteners to share load.
Verify grip range for rivet nuts and structural rivets to ensure full collapse without spinning.
Example setups
Steel tool box wall (~1.2 mm): M6 large-flange rivet nuts + M6 class 10.9 bolts with medium threadlocker for removable installs.
Aluminum service body skin: 4.8–6.4 mm structural blind rivets with isolating washers for a permanent, corrosion-aware joint.
Plywood drawer module: 1/4-20 Grade 5 bolts with fender washers top and a continuous 1/8" steel backing strip underneath.
Selecting the best fasteners for tool boxes and racks isn’t one-size-fits-all. Pairing tool storage mounting hardware to the base material—and applying disciplined mounting plate installation practices—delivers the durability and security professionals expect.
Determining Load Capacity Requirements
Before choosing secure tool mounting fasteners, quantify the loads the fasteners and mounting surface must carry. Start with the real, fully loaded weight of the box or organizer, not the empty weight. Include accessories, dividers, and any mounted chargers. Note the center of gravity and whether the unit will be floor-mounted (primarily shear) or wall/door-mounted (significant moment load).
Account for dynamic forces. In vehicles, potholes and hard braking can impose 2–3× the static load; off-road or service-body environments can see more. Stationary shop mounts typically use a lower factor. Choose a safety factor appropriate to the risk: 2.0 is the bare minimum for non-critical shop storage; 3.0–4.0 is prudent for mobile tool storage.
Understand the load path. A low-profile mounting plate spreads load, but the fastener pattern, spacing, and edge distances determine how forces reach the structure. Wall mounts create a lever arm; the top fasteners often see the highest tensile and shear loads. For floor mounts, loads are mostly in-plane shear with clamp friction contributing if bolts are torqued correctly.
Evaluate the substrate before selecting tool storage mounting hardware:
Steel or aluminum body panels: through-bolts with backing plates outperform self-drillers. Rivet nuts (rivnuts) work when through-bolting isn’t possible; use large-flange or plus-size styles and verify pull-out ratings in the specific gauge.
Wood or composite floors: use through-bolts with fender washers or a continuous backing plate. Lag screws are acceptable only with adequate thickness and pilot holes.
Unistrut/extrusions: use proper channel nuts and torque specs; avoid mixing metals that invite galvanic corrosion.
Choose heavy-duty fasteners based on the controlling failure mode (fastener shear, thread strip, substrate pull-out). As a rule of thumb:
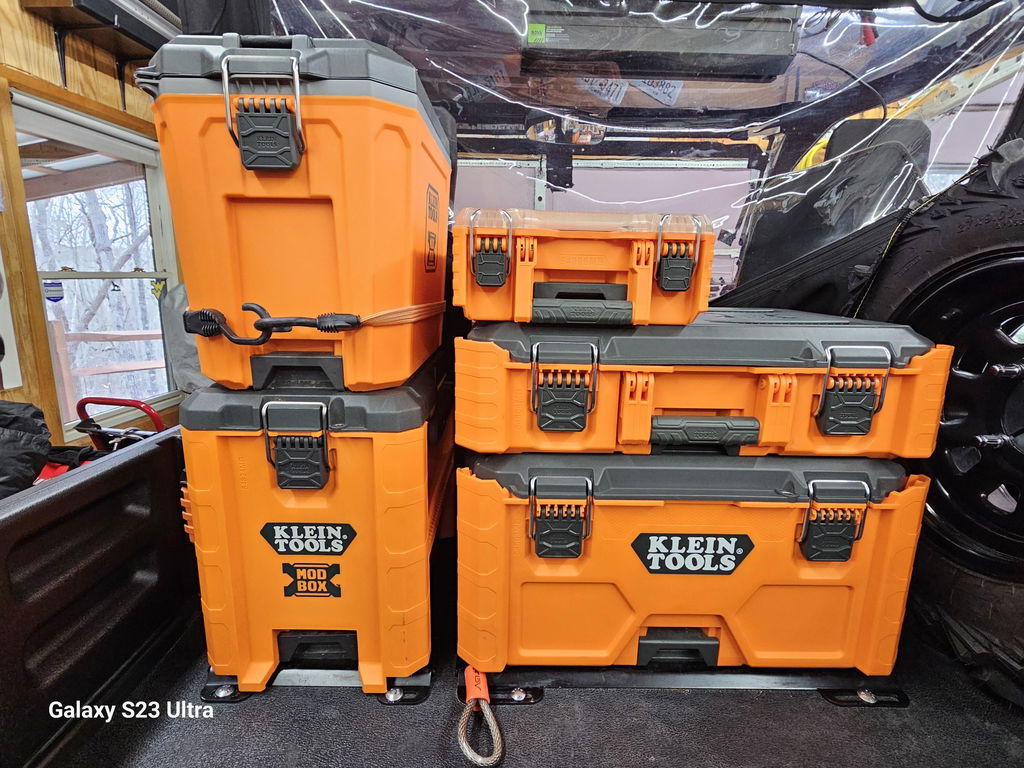
Illustration for Mastering Fastener Selection and Installation for Professional Tool Mounting Security
Diameter: increase diameter before simply increasing grade if the substrate is thin.
Grade/material: Grade 5/8 (SAE) or Class 8.8/10.9 (metric) carbon steel offers high shear; A2-70/A4-70 stainless resists corrosion but has lower strength. Use anti-seize on stainless.
Thread engagement: target 1.0–1.5× diameter in metal; more in softer materials.
Hardware: use large washers or a steel backing plate under thin sheet to prevent pull-through. Add locking nuts or threadlocker for vibration.
Example (vehicle wall mount): A loaded toolbox weighs 80 lb and sits 6 in off the wall. Use a 2.5 dynamic factor and 2.0 safety factor: design load = 80 × 2.5 × 2.0 = 400 lb. With a 6 in lever arm, the moment is 200 lb-in. If four bolts are in a 6 in vertical spread, the top pair may see ~70% of the load; size fasteners and backing to handle at least 140 lb each in combined shear/tension, verified against the substrate’s pull-out data.
During mounting plate installation, consult the plate’s thickness and hole size, and match them to the best fasteners for tool boxes in your environment. For custom fabrication, ensure your DXF hole pattern supports proper edge distances and backing options. These secure fastening techniques help ensure your setup stays locked down when it matters.
Proper Fastener Installation Techniques
Start with the load path. Decide whether the joint will see mostly shear (side load) or tension (pull-out). For mobile tool storage, vibration and sudden deceleration mean both occur. Plan hardware and plate orientation so fasteners carry shear through the shank, not by prying on threads.
Choose the right secure tool mounting fasteners for the substrate:
Vehicle sheet metal (16–22 ga): Use knurled rivet nuts (nutserts) or plus-nuts sized for 1/4-20 or M6. They provide full thread engagement in thin material. For high loads, add a backing strip behind the panel if accessible.
Plywood/composite floors: Through-bolt with fender washers or a steel backing plate under the deck. Wood screws are not reliable for heavy-duty fasteners in mobile use.
Thick steel or aluminum: Tap threads with proper depth or through-bolt. Add anti-seize on stainless to prevent galling.
Use secure fastening techniques that prevent loosening:
Prefer prevailing-torque nuts (nyloc) or serrated flange nuts. Blue threadlocker works well on serviceable joints; avoid combining it with nylon-insert nuts.
Hardened flat washers under both head and nut distribute load and protect powder coat.
For theft resistance, consider tamper-resistant Torx or one-way nuts on exposed hardware.
Follow sizing and geometry best practices:
Edge distance: keep holes at least 1.5–2× fastener diameter from panel edges and bends.
Spacing: 3–4× diameter between fasteners for even load distribution.
Thread engagement: 1–1.5× diameter in steel; increase to 2× in aluminum or rivet nuts.
Use the largest practical diameter that fits the mounting plate installation pattern and tool storage mounting hardware.
Prepare holes correctly:
Mark and pilot drill, then step up to final size to keep holes round.
Deburr both sides to prevent stress risers.
Seal raw metal with primer/paint; seal wood with epoxy or thin CA to reduce crush and moisture ingress.
Preserve powder coat on plates where possible; use washers to avoid chipping.
Assemble with control:
Dry-fit the plate and hardware to confirm alignment.
Install all fasteners finger-tight first, then torque in a crisscross pattern to seat evenly.
Use torque values from a reputable chart for the specific size and grade; recheck after the first duty cycle since coatings and substrates can settle.
Manage corrosion and sealing:
Isolate dissimilar metals (e.g., stainless on aluminum) with nylon washers or barrier coating to avoid galvanic corrosion.
Use sealing washers or butyl tape on exterior penetrations to keep water out of vehicles and boxes.
Real-world examples:
Van wall mount: M6 rivet nuts with serrated flange bolts and blue threadlocker; add a 1/8-inch aluminum backing strip behind thin panels near high-load points.
Trailer floor: 1/4-20 through-bolts with fender washers topside and a continuous 3×12-inch backing plate underneath the plywood.
Tool box lid or drawer: Short 1/4-20 bolts with nyloc nuts and low-profile washers to clear slides; avoid sheet-metal screws for heavy Packout-style attachments.
BocoCustom low-profile, powder-coated mounting plates are designed to pair with common 1/4-20 and M6 heavy-duty fasteners, providing precise hole patterns that speed up accurate, secure installation. Whether you’re bolting directly or using the included slots with your preferred tool storage mounting hardware, these practices help ensure the best fasteners for tool boxes stay tight and reliable on the job.
Avoiding Common Installation Mistakes
Even the most robust mounting plate can be undermined by small errors in fastener choice and technique. Avoid these pitfalls to get the full strength and longevity from your secure tool mounting fasteners.
Choosing the wrong fastener grade: Match load and environment. Use heavy-duty fasteners like Grade 8 (SAE) or 10.9 (metric) for dynamic loads; avoid low-grade or decorative stainless where high clamp load is required. For aluminum substrates, consider stainless A4/316 for corrosion resistance but verify strength and use anti-seize to prevent galling.
Insufficient thread engagement: Aim for a minimum of 1x bolt diameter engagement in steel and 2x in aluminum. A 1/4-20 bolt needs at least 1/4 in of full thread in steel; an M6 needs ~6 mm in steel. Count coatings and spacers when selecting length.
Under- or over-torque: Torque drives clamp load. Follow torque charts for the specific fastener size, grade, and condition (dry vs lubricated). Powder-coated surfaces and zinc plating reduce friction variability—apply consistent torque and verify with a calibrated wrench.
Skipping vibration resistance: Road and jobsite vibration will walk hardware loose. Use secure fastening techniques such as blue threadlocker (e.g., 242/243) on clean threads or nylon-insert locknuts. Don’t combine threadlocker with anti-seize. Reserve high-strength/red threadlocker for permanent assemblies.
Misreading the load path: Bolts are strongest in tension with friction carrying shear. Use all provided mounting points on the plate, add hardened washers, and avoid relying on a couple of bolts to carry the entire shear load. Backing plates dramatically improve pull-through resistance in thin sheet.
Wrong anchor for thin material: Self-tappers in vehicle sheet metal are prone to strip. Use rivet nuts or plus-nuts with the correct grip range and knurled body, set with a proper tool. In plywood, T-nuts or threaded inserts provide far better pull-out strength than wood screws.
Poor hole prep and alignment: Oversized or oval holes cause fastener creep. Transfer hole locations from the plate or DXF precisely, center punch, step-drill to size, and deburr both sides so washers seat flat. Avoid stacking slotted holes without dowel pins or shoulder bolts if precision is required.
Ignoring galvanic corrosion: Stainless bolts into bare aluminum can corrode the base over time. Isolate dissimilar metals with nylon washers or a barrier compound, and seal exposed edges. This extends the life of tool storage mounting hardware in wet or salted environments.
Clearance and profile issues: Verify latch, drawer, and slide motion before final torque. On Packout-style systems and low-profile mounting plate installation, use button-head or flange hardware where needed to maintain clearance.
No inspection plan: Mark torqued fasteners with a torque stripe, then re-check after the first week of use and periodically thereafter. Look for powder-coat witness marks, fretting, or elongating holes—early signs something is moving.
For many tool boxes, the best fasteners for tool boxes and vehicle upfits are flanged Grade 8 or 10.9 bolts with hardened washers and locknuts, installed into properly supported substrates. Pair quality hardware with precise fabrication or DXF-driven layouts, and your tool storage mounting hardware will stay secure for the long haul.
Maintaining Fasteners for Security
Security doesn’t end at mounting plate installation. It’s sustained by a simple, repeatable maintenance routine that keeps secure tool mounting fasteners tight, corrosion-free, and load-ready despite vibration, weather, and daily use.
Adopt an inspection cadence
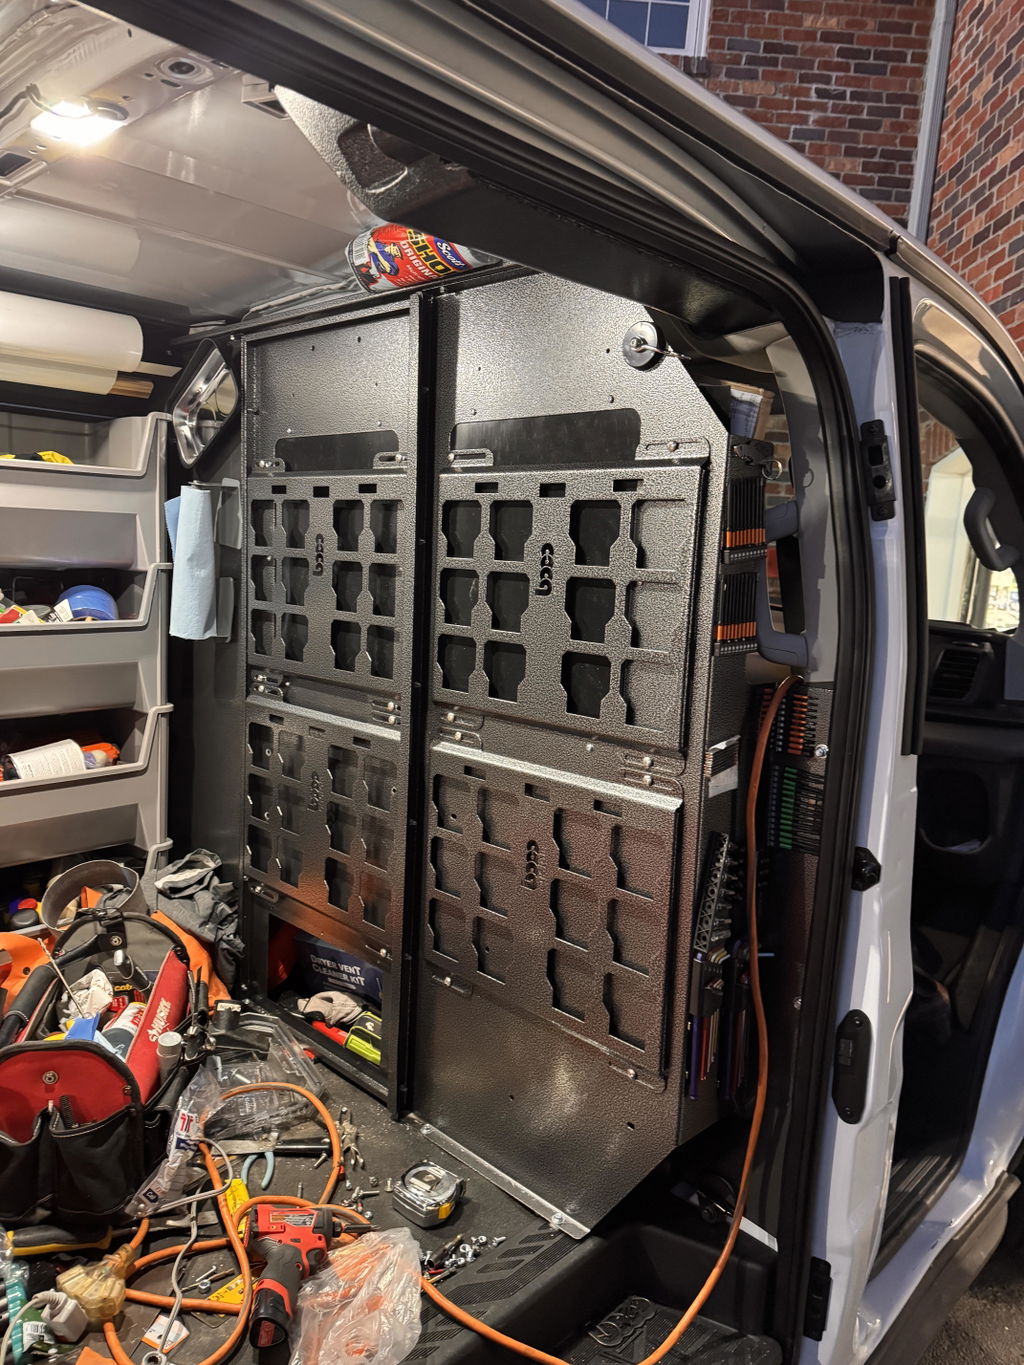
Illustration for Mastering Fastener Selection and Installation for Professional Tool Mounting Security
Vehicle/trailer setups: quick check weekly or every 500 miles; full torque verification monthly.
Shop carts and wall systems: visual check biweekly; full torque verification every 60–90 days.
After first install: re-torque after 24–48 hours of use as hardware seats and coatings compress.
Verify torque with intent
Use a calibrated torque wrench and follow torque charts by diameter, thread pitch, and grade (e.g., M6/Class 8.8 and 1/4-20/Grade 5 have modest torque requirements; over-tightening can crush substrates or strip threads).
Mark fastener/nut interfaces with torque seal or paint pen “witness marks” to spot movement at a glance.
Retorque only on clean, dry threads unless a lubricant or threadlocker was originally specified—changing friction changes clamp load.
Maintain locking performance
Favor nylon-insert lock nuts or all-metal prevailing-torque nuts on vibration-prone rigs; replace nylocs after ~5 service cycles or if exposed to heat/solvents.
Apply medium-strength threadlocker (e.g., 242/243) on clean, oil-free threads where regular removal isn’t required.
If stainless-on-stainless is used, prevent galling with a small amount of anti-seize and rely on mechanical locks; don’t combine anti-seize with threadlocker.
Control corrosion and galvanic attack
Inspect exposed threads, washers, and mounting plate edges for rust or coating damage. Touch up chips on powder-coated components like Boco Custom plates to seal out moisture.
In salted or coastal environments, rinse assemblies and apply a light corrosion inhibitor to exposed hardware.
When mating dissimilar metals (e.g., stainless bolts to aluminum tool boxes), add nylon or zinc-plated isolator washers to reduce galvanic potential.
Protect the substrate
For thin sheet metal or aluminum beds, check rivnuts or plus nuts for spin-out and re-seat or replace if they rotate during torque checks.
On wood decking, watch for compression set; add or upsize fender washers to distribute load as fibers relax.
Inspect slotted tool storage mounting hardware for elongation; replace bolts and consider wedge-lock washers (e.g., Nord-Lock) where vibration is severe.
Know when to replace
Replace any fastener showing red rust, pitting, rounded heads, stretched threads, or wobble in the joint.
Retire washers that are cupped or chewed, and hardware that no longer holds torque despite clean threads and proper technique.
Stock the right service kit
Keep spare heavy-duty fasteners in the sizes used on your system (e.g., M6/M8 or 1/4-20/5/16-18), matching grade/coating, plus nyloc nuts, fender and serrated-flange washers, torque seal, threadlocker, anti-seize, and a torque chart.
These secure fastening techniques preserve clamp load and extend the life of your mounting plate installation. For the best fasteners for tool boxes and racks, choose the strongest grade your substrate can support (often Class 8.8/10.9 or Grade 5/8 with a protective finish), then maintain them on schedule for reliable tool storage mounting hardware that stays put.
Ensuring Lasting Tool Organization
Long-term organization starts with the right secure tool mounting fasteners and a disciplined install. The goal is simple: create consistent clamp load that survives vibration, impacts, and weather without loosening or deforming the substrate.
Choose hardware to match the load, environment, and base material:
Materials: Zinc-plated steel for dry interiors; stainless (A2/A4) for moisture, salt, or chemical exposure. Avoid dissimilar-metal pairs that invite galvanic corrosion—use isolating washers or matching alloys.
Strength: Grade 8 (SAE) or 10.9 (metric) heavy-duty fasteners for high dynamic loads; A2-70 stainless where corrosion resistance matters more than ultimate strength.
Threads and heads: M6 or 1/4-20 are common for tool storage mounting hardware. Button or low-profile socket heads prevent snagging; flange heads spread load without a separate washer.
Locking: Nylon-insert lock nuts, all-metal lock nuts, or medium-strength threadlocker for secure fastening techniques in high-vibration vehicles and jobsite carts.
Washers: Flat or fender washers to spread load on thin sheet; neoprene or fiber washers to damp vibration and protect powder coat.
Match anchoring to the substrate:
Thin sheet metal (vans, carts): Rivet nuts (rivet-nuts) or plus-nuts provide strong threads without backside access. Increase footprint with a backing plate where possible.
Wood/composite (drawer systems, plywood decks): T-nuts or through-bolts with large washers/backers resist pull-through.
Thick steel/aluminum: Tap threads only when you have sufficient thickness; otherwise, through-bolt with lock nuts.
A proven mounting plate installation workflow: 1. Plan hole layout using the plate as a template or Boco Custom DXF files for CNC-accurate patterns. Observe edge distance and spacing to avoid tear-out. 2. Drill to the correct size; deburr both sides. For steel, touch up bare edges to prevent corrosion. 3. For powder-coated surfaces, protect the finish with washers; avoid over-compressing the coating. 4. Install anchors (rivet nuts/plus-nuts) squarely; verify proper crush and thread alignment. 5. Dry-fit the plate to confirm clearances, especially on low-profile lids and drawers. 6. Final assembly with clean threads, appropriate lubrication per the fastener spec, and torque to a manufacturer chart. Use a cross pattern on multi-bolt patterns to seat evenly. 7. Apply threadlocker or lock nuts as planned. Re-check torque after the first week of service; then add to quarterly inspections.
Example setups:
Service truck bed with steel deck: Boco Custom low-profile plate, 1/4-20 Grade 8 flange bolts, flange nylock nuts, and a 12-ga steel backing plate under thin sheet for impact loads.
Van shelving (1/8 in aluminum): M6-1.0 stainless rivet nuts, M6 button-head A2-70 bolts with stainless washers and medium threadlocker; add neoprene washers to minimize rattle.
Plywood top on a mobile cart: Through-bolt with 1/4-20 bolts, fender washers above and a continuous steel strip below to distribute shear from rolling starts/stops.
Maintenance that preserves the best fasteners for tool boxes:
Inspect quarterly for looseness, paint wear, and slot elongation.
Replace any rounded heads, stretched bolts, or crushed washers.
Rinse road salts; apply anti-seize on stainless threads in coastal regions.
Boco Custom’s heavy-duty, low-profile plates work with major systems and arrive powder-coated, supporting a clean, durable install. Whether you bolt direct or fabricate via instant-download DXF files, aligning the right fasteners with sound technique is what locks in lasting tool organization.
Standard shipping takes 5 to 7 business days. Express (2 to 3 days) and overnight options are available at checkout. Orders over $50 ship free.
Can I order online and pick up in store?
Yes. Select "Pick up in store" at checkout and choose your nearest location. Most orders are ready within 2 hours.
What if my order arrives damaged?
Contact us within 7 days of delivery with your order number and a photo. We'll arrange a replacement or refund, no return shipping required.
AI-Generated Content Disclosure
This blog post was created with the assistance of RankGPT, an AI-powered tool designed to generate high-quality, SEO-optimized content at scale.
As a small business embracing modern technology, we use AI to help us:
Produce informative articles more efficiently
Increase our online visibility through better performance in traditional search engines (like Google) as well as emerging AI-powered searches and answer engines
Reach more potential customers and grow our presence in a competitive digital landscape
By leveraging tools like RankGPT, we're able to publish valuable content more consistently and scale our efforts in ways that would otherwise take significantly more time and resources.
Important notes for readers:
While RankGPT helps create well-structured and relevant content based on current best practices, AI-generated posts are not always 100% accurate, complete, or free from errors.
The information, opinions, and perspectives expressed may not fully reflect the exact views, experiences, or official positions of Boco Custom, its team members, or the individuals involved in our business.
AI content should be viewed as a starting point or general resource—not as personalized professional advice, definitive facts, or a substitute for direct consultation with us or qualified experts.
We always recommend verifying important details independently, especially for decisions related to custom products, services, or any business matters.
We are committed to transparency and continually work to improve our content. If you have questions, feedback, or spot any inaccuracies, please reach out—we genuinely appreciate it!
Not only is this way overbuilt for the price with its solid, confident craftsmanship, I am completely convinced that these guys are the best around when it comes to the packout platform.
I like these, they are much more compact than what Milwaukee offers. I had them powder coated in silver vain and they look awesome. I love the bonus half rack they sent me. That’s the mark of a nice company.


Leave a comment