Optimize Your Mobile Workflow: Securely Installing Tool Storage Systems
The importance of secure mobile storage
Secure mobile tool storage is more than convenience—it’s a safety and productivity requirement when your livelihood rides in a van, pickup, or trailer. Unrestrained tool cases become projectiles under hard braking, and loose gear wastes minutes on every stop. Purpose-built mounts create a predictable, repeatable layout that protects your tools, your vehicle, and your crew while accelerating mobile workshop organization.
Practical gains show up fast:
Safety: Mounted cases won’t shift on corners, speed bumps, or sudden stops.
Tool protection: Vibration and impacts shorten the life of batteries, housings, and calibrated instruments; secure plates isolate movement.
Time savings: Consistent locations mean fewer trips and less rummaging, improving professional tool organization.
Noise reduction: Eliminates rattles and clatter that cause driver fatigue.
Professional image: A clean, labeled layout reassures clients and reflects tradecraft.
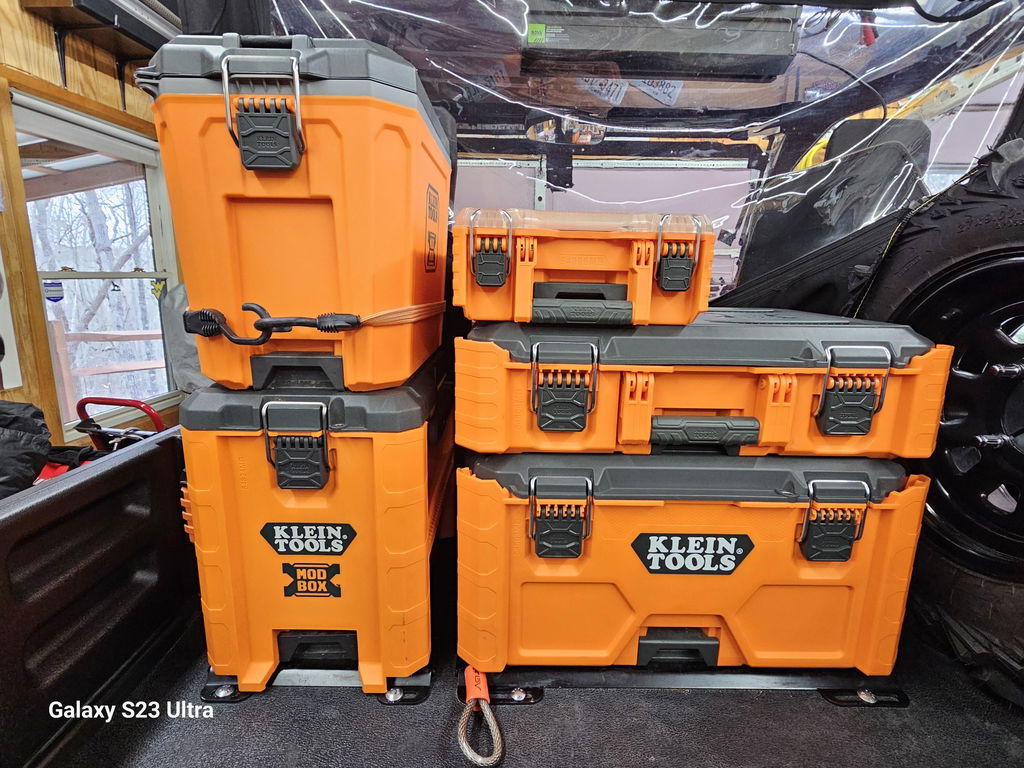
In real terms, an electrician can anchor a Milwaukee Packout stack to a bulkhead plate while staging service meters in a drawer system. A plumber can use low profile tool mounts on the van floor to secure drain machines yet keep clearance to slide in a water heater. In a pickup, bed-mounted plates keep saws and nailers from sliding into the tailgate, providing secure vehicle tool storage without sacrificing cargo space.
What to look for in heavy duty tool mounting:
Material and construction: Thick-gauge steel or aluminum with reinforcement ribs resists flex; powder-coated finishes deter corrosion.
Low profile design: Keeps floors usable, fits under shelves, and minimizes snag points.
System compatibility: Accurate hole patterns for major ecosystems prevent slop and premature wear.
Load path integrity: Mounting points should tie into structural areas, not thin trim panels.
Installation best practices:
Use rivnuts or plus nuts in sheet metal and grade 8 hardware where appropriate.
Align plates with floor ribs or chassis crossmembers; avoid fuel and brake lines.
Add rubber isolators where sensitive instruments are stored.
Torque fasteners correctly and re-check after the first week, then quarterly.
Label zones by task (rough-in, finish, service) to streamline retrieval.
For fabricators building out custom interiors, precision matters. DXF files with exact hole patterns let you cut plates that follow floor contours, integrate with drawer slides, or add tie-downs, ensuring a tight fit and reliable performance.
Whether you buy ready-made plates or fabricate your own, investing in secure mobile tool storage pays back through reduced damage, fewer lost minutes, and a safer, quieter ride.
Selecting optimal mounting plates
Choosing the right plate is the foundation of secure mobile tool storage. The plate you select dictates how safely, quietly, and efficiently your boxes ride, and how quickly you can access them on the job.
Prioritize these factors when comparing options:
System compatibility: Match the hole pattern and footprint to your toolbox system (e.g., Milwaukee Packout). If you run mixed systems, look for hybrid layouts or multiple mounting zones.
Strength and load rating: Heavy duty tool mounting demands plates built from robust material with smart ribbing or bends. Confirm the plate and hardware exceed the combined weight of cases plus contents, especially under bumps and braking.
Low profile: Low profile tool mounts preserve aisle space, prevent snagging, and keep center of gravity down. They also help drawers and doors clear in tight vans.
Corrosion resistance: Powder-coated finishes stand up to moisture, salt, and jobsite abrasion better than bare steel. This protects both the plate and your vehicle.
Attachment method: Choose mounting that suits your vehicle structure—rivnuts for thin sheet metal, through-bolts with backing plates for wood/composite floors, or adapters to tie into existing L-track/Unistrut. Use graded hardware and nyloc or threadlocker to resist vibration.
Security features: Lock points, hidden fastener access, or tamper-resistant hardware help deter theft and keep cases anchored during transport for secure vehicle tool storage.
Vibration control: Rubber isolators or nylon washers can cut rattles and protect latches over rough roads.
Modularity: Extra slots or accessory holes let you reconfigure as your kit evolves, supporting long-term professional tool organization.
Practical configurations:
Service van wall: A low-profile vertical plate with staggered mounting slots lets Packout stacks lock in without protruding into the aisle. Install with rivnuts along reinforced ribs; check door sweep clearance before final placement.
Pickup bed: A bed-formed base plate that aligns with factory tie-downs spreads load across corrugations and keeps drain paths open. Add tamper-resistant hardware under the rail caps.
Enclosed trailer: Continuous rail plates tied into the wall studs distribute weight and prevent oil canning. Place heavier cases low to maintain balance.
If you fabricate in-house, instant-download DXF files accelerate prototyping and production. Cut plates on a laser or waterjet to precise dimensions, adjust hole spacing for unique layouts, and finish with powder coat for durability.
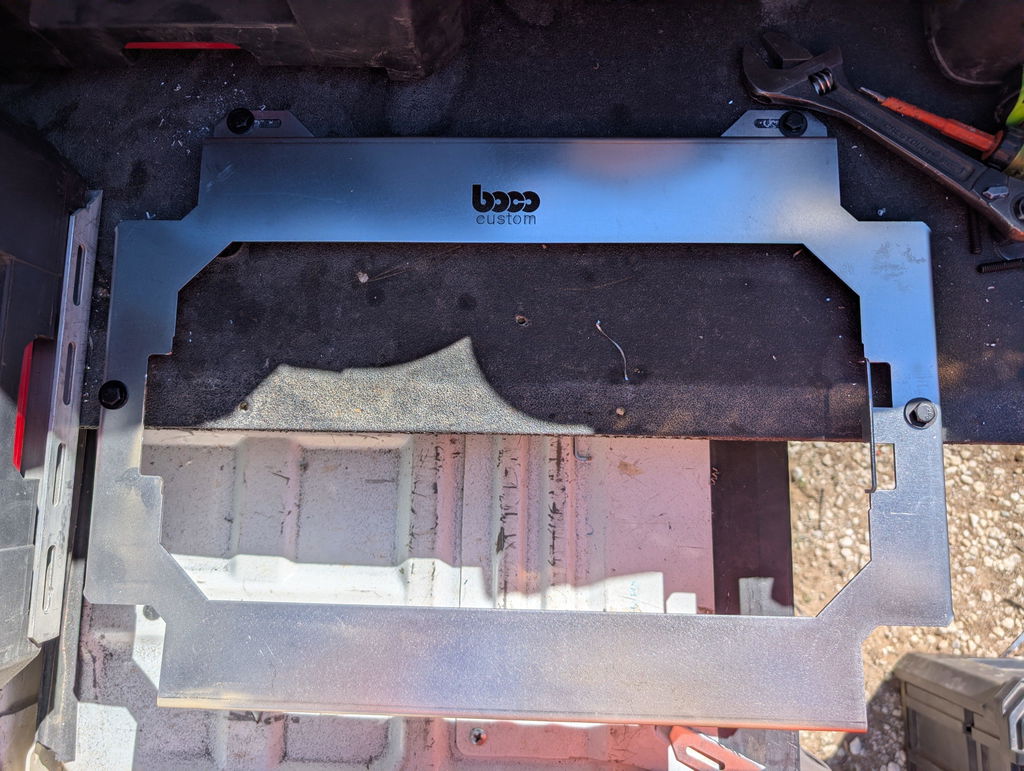
Boco Custom builds heavy-duty, low-profile plates for major tool systems, powder-coated for longevity with same-day shipping and local pickup available. The result: secure mobile tool storage that streamlines mobile workshop organization and stands up to daily use.
Preparing vehicle for installation
Thoughtful prep is the difference between a tidy mobile workshop and a rattling liability. Before any fasteners go in, map the vehicle, loading, and anchoring so your secure mobile tool storage performs on day one and after thousands of miles.
Start with payload and balance
Inventory tools and cases, note weights, and confirm you’ll stay within GVWR and rear axle ratings.
Aim to keep heavy items low and as close to the vehicle centerline as possible; target roughly 60/40 front-to-rear distribution.
Plan for growth: reserve 10–15% capacity for future tools or materials.
Plan the layout
Measure door openings, wheel-well intrusions, bulkheads, seat travel, and headliner height.
Confirm clearance for drawers, Packout towers, or bins to slide out without clipping door seals or trim.
Use centerlines and painter’s tape to mark footprints; note any service access panels you must preserve.
Choose low profile tool mounts where you need to maximize vertical space under shelves or racks.
Select an anchoring strategy
Cargo vans: Use OEM tie-downs and threaded inserts when available. For ribbed or thin floors, add a 3/4 in plywood (or aluminum) false floor to spread loads, then install steel M6–M8 rivnuts or through-bolts with backing plates.
Truck beds: Through-bolt into bed channels with Grade 8 or 10.9 hardware and large fender washers/backing plates; avoid fuel tanks and wiring under the bed. L-track or Unistrut adds modularity for heavy duty tool mounting.
Enclosed trailers: Tie into steel crossmembers where possible. If mounting to plywood, through-bolt with wide backing plates and seal penetrations.
Prep surfaces and hardware
Degrease, remove rust, and prime cut edges. Use seam sealer around drilled holes to prevent moisture ingress.
Isolate dissimilar metals (e.g., aluminum plate on steel floor) with nylon washers or rubber pads to minimize galvanic corrosion.
Choose nylock nuts or medium-strength threadlocker; torque to spec and record values.
Use accurate templates
Dry-fit mounting plates first. Boco Custom’s instant-download DXF files let you CNC or print 1:1 drilling templates for precise hole placement, reducing rework and ensuring secure vehicle tool storage.
Mind electrical and safety
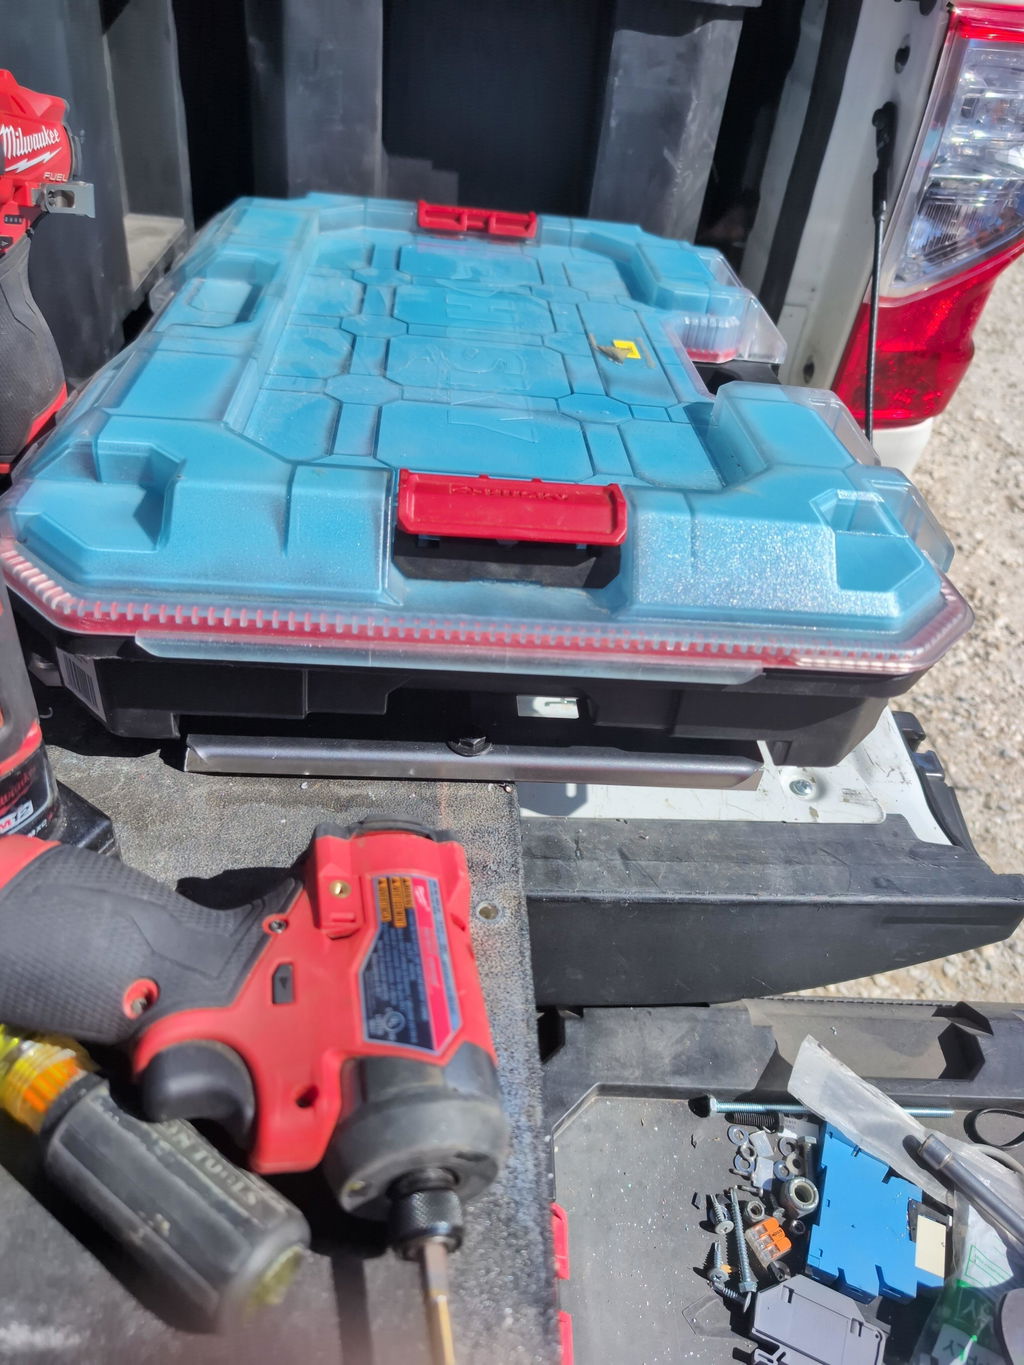
Illustration for Optimize Your Mobile Workflow: Securely Installing Tool Storage Systems
Verify locations of fuel lines, wiring looms, SRS/airbag sensors, and EV battery trays before drilling.
Protect rerouted wires in loom with grommeted pass-throughs. Maintain access to a fire extinguisher and do not block OEM jack/tool compartments.
Validate before final load
Perform a shake test with ratchet straps, then a controlled brake test in a safe area. Re-torque fasteners after the first 100 miles.
Need to move fast? Powder-coated, low-profile Boco Custom plates ship same day, and local pickup is available—keeping professional tool organization on schedule.
Essential installation tools and materials
Start with a precise layout. Verify the exact footprint of your plates and boxes, mark centerlines, and confirm clearances with doors, drawers, and tie-down points. If you’re fabricating your own plates, Boco Custom’s instant-download DXF files provide accurate hole patterns—print at 100% scale for a drill template or transfer directly to steel or aluminum.
Core measuring and layout
Tape measure, steel ruler, and combination square
Center punch and automatic punch for clean, repeatable hole starts
Marking tools: paint pen, scribe, and masking tape for reference lines
Cardboard or 1/4" MDF for quick mockups to validate reach and lid swing
Cutting and drilling
Variable-speed drill/driver and right-angle drill for tight spaces
Step bits and high-quality cobalt bits sized to your hardware
Countersink and deburring tools for flush, safe edges
Jigsaw or cutoff wheel if trimming subfloors or brackets
Fastening for heavy duty tool mounting
Rivnut/nutsert kit with mandrels in M6/M8 or 1/4"-20 and 5/16"-18
Impact driver, torque wrench, and hex/torx sockets
Stainless or zinc-plated Grade 5/8 bolts, nyloc nuts, and fender washers
T-nuts or threaded inserts for plywood subfloors
Blue threadlocker to resist vibration; anti-seize for stainless hardware
Substrate-specific materials
Steel truck beds: rivnuts for blind fastening; primer and seam sealer for hole edges; butyl tape under plates to keep water out
Plywood decks: 3/4" marine-grade plywood, through-bolts with large fender washers or backing plates beneath
Aluminum bodies: aluminum or stainless rivnuts, nylon isolator washers to reduce galvanic corrosion
Protection and refinement
Degreaser and isopropyl alcohol to clean before mounting
Rust-inhibiting primer/paint, edge sealer, and rubber grommets for pass-throughs
Closed-cell foam or neoprene pads to decouple vibration and protect finishes
Cable clamps, zip ties, and loom if integrating power or lighting into your mobile workshop organization
Safety
Eye/ear protection, gloves, vacuum or magnet mat to capture shavings
Mounting plates
Powder-coated, low profile tool mounts like Boco Custom’s reduce snag points and keep aisles open while delivering secure vehicle tool storage. For example, in a van with a 3/4" plywood deck, use four M8 through-bolts with backing plates beneath the floor. In a steel bed where underside access is limited, set M8 rivnuts in bed ribs, seal the bores, and torque stainless bolts with threadlocker.
These tools and materials support secure mobile tool storage that withstands daily vibration, weather, and load shifts—critical for professional tool organization that’s safe, tidy, and fast to access.
Secure mounting plate installation steps
Start with a layout plan. Measure the footprint of your cases and carts, mark door swing and drawer travel, and note tie-downs and wheel wells. Keep heavy items low and centered to support secure mobile tool storage and balanced handling. Dry-fit your low profile tool mounts to confirm latch clearance and reach.
Verify the substrate. For steel van floors, M6/M8 rivnuts or plusnuts spread load without access below. For aluminum or thin sheet, plusnuts offer better grip. For plywood decks or drawers, use through-bolts with fender washers or backing plates; in composite bed liners, add aluminum backing bars. In truck beds, leverage OEM tie-down points where possible for secure vehicle tool storage.
Choose hardware and map holes. Boco Custom plates are heavy-duty and powder-coated; use the provided mounting pattern where available. If you fabricated from a DXF file, deburr edges, check hole sizes against your insert spec, and seal bare metal after drilling. Plan at least four anchors for compact plates and six to eight for longer runs to distribute dynamic loads during mobile workshop organization.
Protect what’s under the floor. Before drilling, probe for wiring, fuel/brake lines, and HVAC ducts. Use a drill stop or collar to control depth. Vacuum chips and apply rust inhibitor to exposed steel.
Install inserts or backing. Set rivnuts/plusnuts with a proper tool to achieve full collapse without spinning; verify clamping by hand. For through-bolts, use stainless or zinc-plated grade 8.8 hardware with large washers/backing plates. On wood, pre-drill to avoid splitting; on thin sheet, avoid oversizing holes.
Position and fasten the plate. Align to your marks and loosely install fasteners. Check square by engaging a tool box or rail. Apply medium-strength threadlocker and torque per fastener spec (typical M6: 7–10 N·m; M8: 18–25 N·m—confirm with your hardware). Use nylon-insert lock nuts where accessible.
Seal and isolate. Where fasteners penetrate to exterior, use sealing washers and automotive seam sealer. Add dielectric barriers between dissimilar metals to mitigate galvanic corrosion.
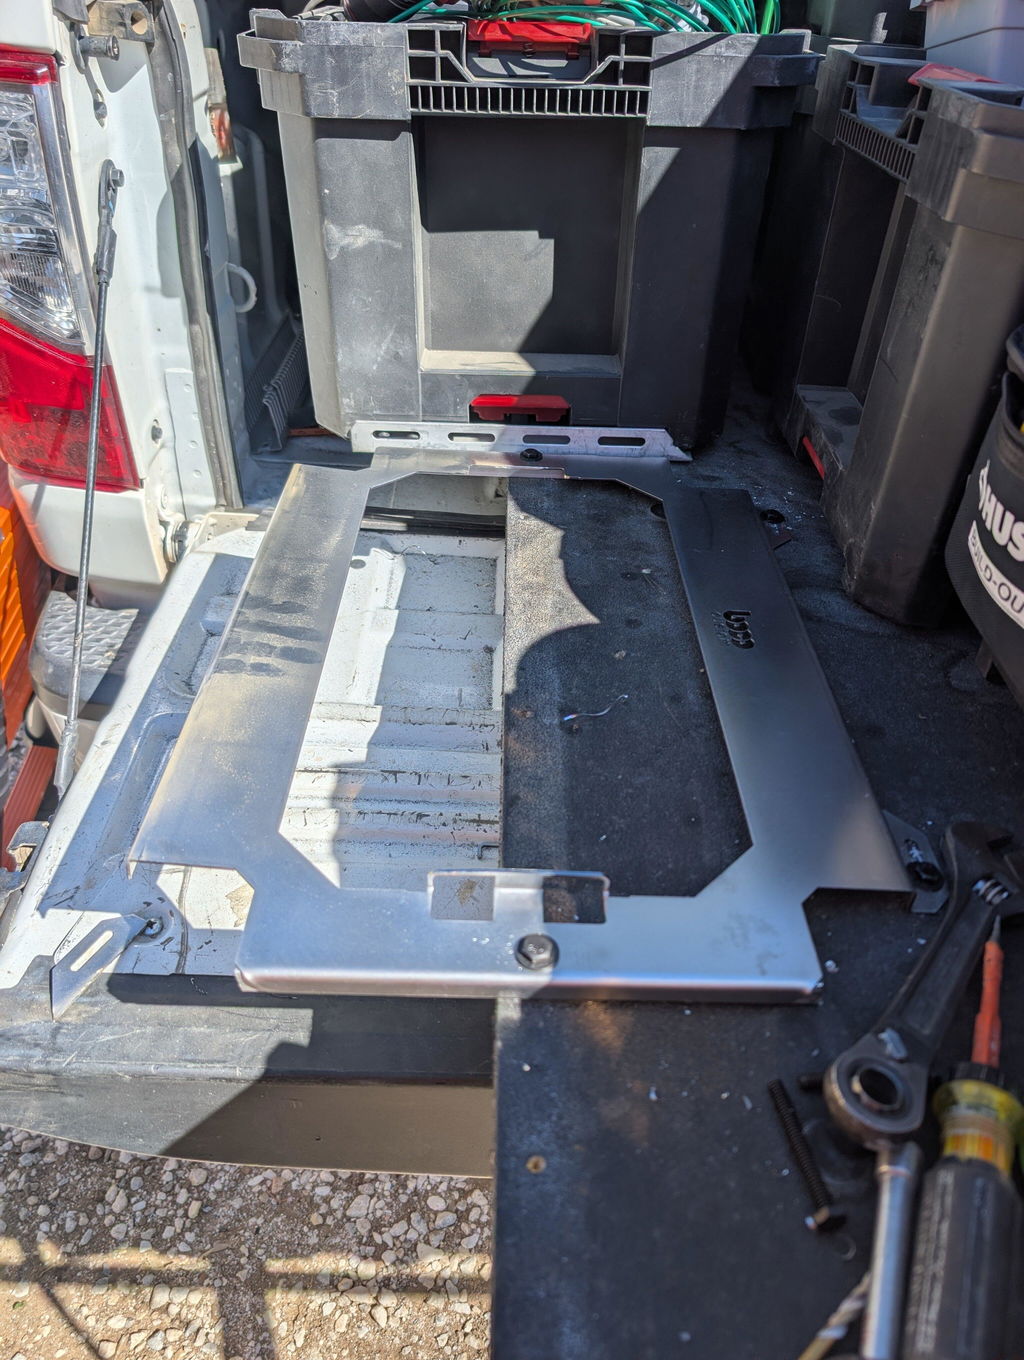
Illustration for Optimize Your Mobile Workflow: Securely Installing Tool Storage Systems
Function-test and load-test. Engage each tool case to confirm full latch engagement and no interference. Drive a short route with braking and cornering, listen for movement, then retorque fasteners after 50–100 miles.
Document and label. Record anchor locations and torque values for maintenance. Label zones on the plate to sustain professional tool organization as your kit evolves.
Achieving low-profile tool organization
Low-profile organization keeps tools locked in place without stealing headroom or cargo space. By bringing mounts closer to the deck and aligning them to the vehicle’s structure, you improve safety, reduce snag hazards, and create truly secure mobile tool storage that survives rough roads and fast-paced job sites.
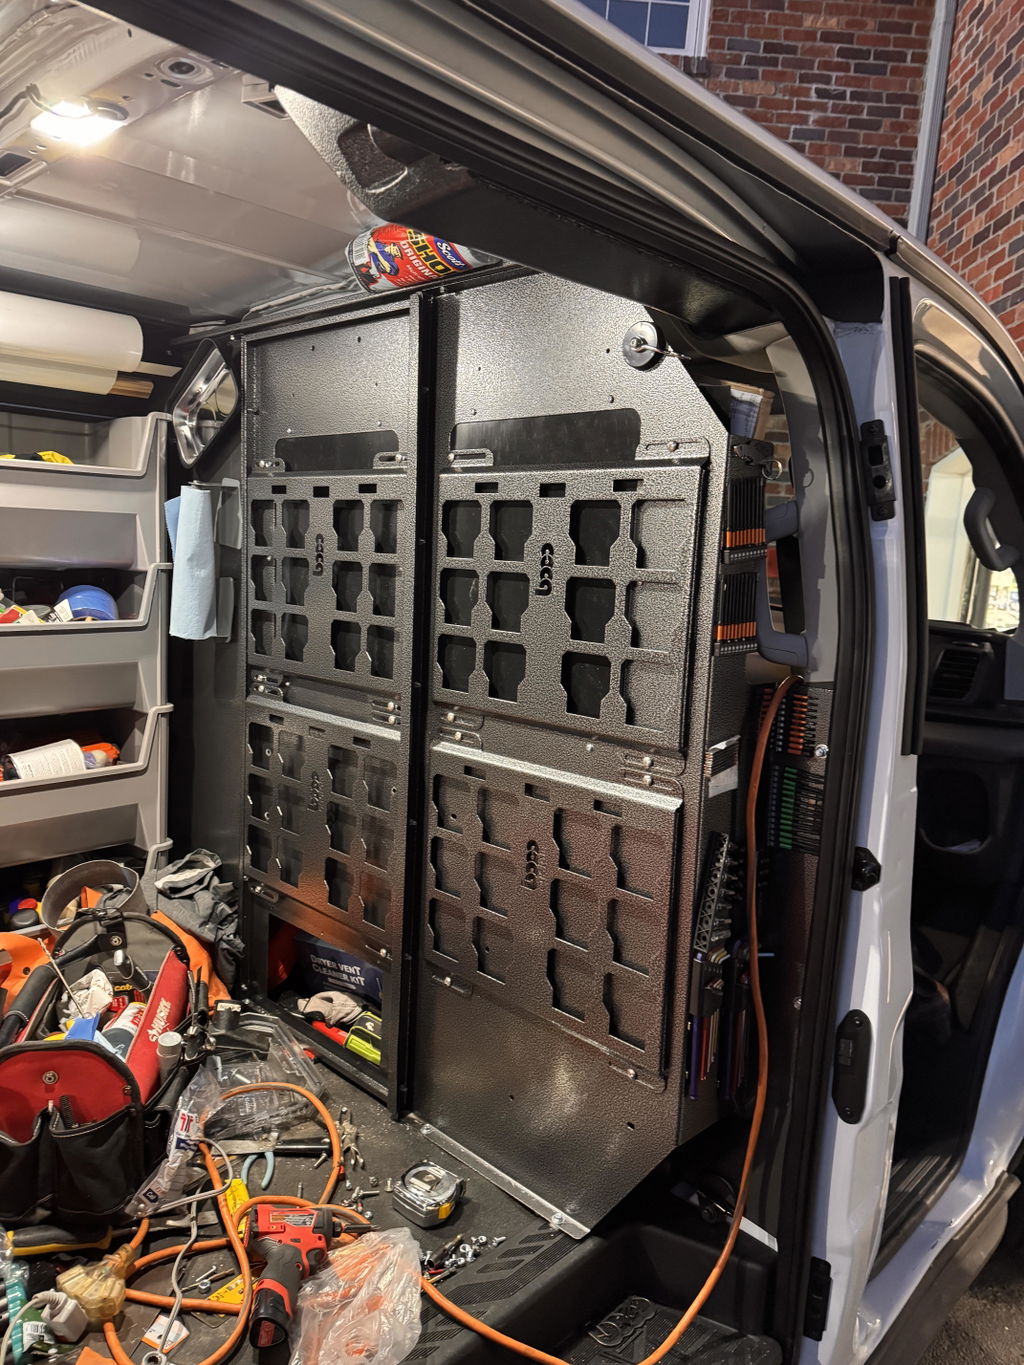
Start with a plan. Map your layout around doors, drawers, and hatch swing paths, and spread weight over crossmembers or reinforced floor zones. Boco Custom’s heavy-duty, low profile tool mounts are engineered for major tool systems, making it straightforward to place Packout-style bases where they won’t interfere with sliding doors or wheel-well trim. In a cargo van, for example, a plate centered between factory tie-downs keeps modules flush and accessible while leaving a clear aisle.
Prioritize attachment methods that won’t add height. Through-bolt with backing plates where possible, or use rivnuts in thicker sheet metal; both allow you to use countersunk fasteners so the plate stays flush. Apply threadlocker, use nylon-insert lock nuts, and re-torque after the first week of driving to maintain heavy duty tool mounting integrity.
Control vibration and corrosion from day one. A thin rubber underlayment reduces drumming and rattles without adding measurable height. Powder-coated plates resist abrasion and road salt; seal exposed holes with seam sealer to protect the vehicle body. Deburr cut edges and add edge trim around any pass-throughs to preserve harnesses and hoses.
Build in retention for secure vehicle tool storage. Use locking rails or strap points to keep stackable boxes from shifting on steep grades. Orient latches away from doors to discourage opportunistic access, and add tether points for high-value kits that move between sites.
Low-profile best practices:
Keep a minimum finger-width clearance around module handles and release tabs
Align to factory tie-downs before drilling new holes
Countersink wherever footsteps or rolling carts pass
Leave service access to fasteners and wiring
Isolate dissimilar metals; use stainless or coated hardware
Add UHMW tape at contact points to eliminate rattles
Label locations for repeatable mobile workshop organization
If you fabricate in-house, Boco Custom’s instant-download DXF files let you cut plates that follow floor ribs, seat-delete contours, or trailer crossmember patterns with exact hole spacing for popular systems. Mirror a van-side plate for the opposite wall, notch around bulkheads, and hit your deadlines without guesswork. Prefer ready-to-install? Powder-coated plates ship the same day or are available for local pickup to keep professional tool organization projects on schedule.
Post-installation checks for stability
Start with a systematic inspection before loading tools. Verify the plate-to-vehicle interface first. Confirm every fastener is seated flush, lock washers or nylon-insert locknuts are used where specified, and threadlocker is applied on vibration-prone joints. If you fabricated brackets from Boco Custom DXF files, confirm hole positions and edge distances match your plan and that no sharp edges remain.
Check the substrate. In vans and service trucks, look beneath the floor for proper reinforcement. Plywood should be marine or exterior grade with adequate thickness and backing plates; sheet metal should have rivnuts or through-bolts with large-area washers. Look for crushing around fasteners, which indicates over-tightening or insufficient backing.
Validate alignment and latch engagement. Mounting plates should sit flat with no rocking. Attach your boxes or organizers and confirm latches engage fully without excessive force. Low profile tool mounts reduce lever arm forces; ensure there’s still room to remove and seat cases without rubbing trim, wiring, or seat mechanisms.
Perform a static load test using real-world weight. Load the system to typical working mass (e.g., fully stocked Packout cases), then:
Pull and push laterally on the highest tier to check for deflection.
Measure any movement at reference points; note anything beyond a few millimeters.
Listen for creaks or fastener “popping,” which can signal joint slip.
Follow with a vibration and road test to validate secure vehicle tool storage:
Drive over speed bumps, cobblestones, and perform controlled stops/starts.
Note rattles; identify contact points and add rubber isolators or edge trim as needed.
Re-check torque after the first drive. Apply torque-mark paint to fastener heads to monitor future movement.
Inspect finish and corrosion control. Powder-coated components from Boco Custom resist wear, but touch up any chips immediately to prevent rust. Verify drain paths and avoid trapping moisture under plates or mats.
Confirm safety clearances. Ensure the installation does not interfere with seat travel, seatbelt anchors, airbags, or battery compartments. Check that cargo tie-downs remain accessible for additional heavy duty tool mounting.
Document and schedule maintenance. Record fastener sizes and locations, keep a torque checklist in the vehicle, and set a re-torque interval: after one week, then every 90 days or after off-road use. This cadence supports secure mobile tool storage and professional tool organization as your mobile workshop organization evolves.
Final pass: shake each module by hand. A stable system won’t rattle, flex noticeably, or shift under abrupt force. If it does, revisit backing plates, fastener length, or add secondary retention.
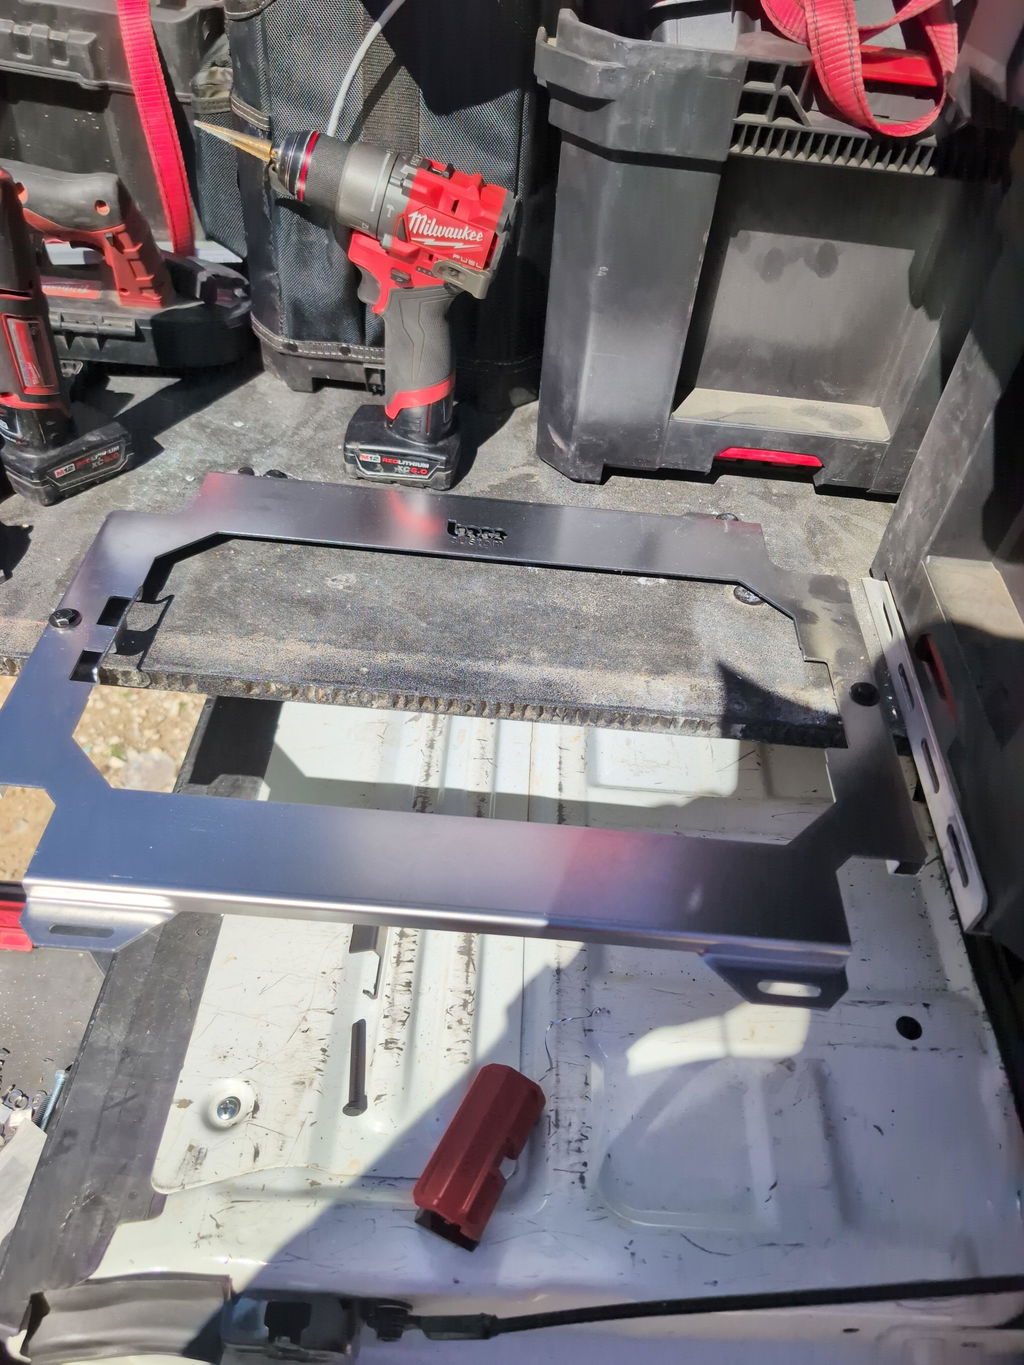
Illustration for Optimize Your Mobile Workflow: Securely Installing Tool Storage Systems
Maintaining secure mobile storage
Keeping tools locked down on the road is a process, not a one-time install. Vehicles expose mounts to vibration, sudden stops, and temperature swings. Plan for those forces up front, then build simple routines that keep secure mobile tool storage reliable day after day.
Start with structure. Fasten mounting plates to reinforced areas—bed rails, frame-tied points, ribs, or properly backed plywood—not thin interior panels. Use multi-point attachment with quality hardware, a suitable threadlocker, and torque to the vehicle or rack manufacturer’s spec. Where you’re in thin sheet metal, add backing plates or plusnuts with adequate edge distance. Low profile tool mounts from Boco Custom help keep the center of gravity tight to the surface, reducing leverage and loosening.
Mind weight and layout. Place heavier boxes low and forward of the axle to limit pitch and sway. Group high-use kits within easy reach to minimize climbing and awkward pulls. For mobile workshop organization, standardize case sizes and label every bin; fewer gaps means less motion and less wear on latches.
Prioritize retention. Match your plate to the exact tool system’s hole pattern so the latch geometry is correct. Use secondary retention where appropriate: integrated locks, tether points, or a discreet cable lock for secure vehicle tool storage when parked. In open trucks, consider a rigid cover or canopy to keep weather off the hardware and reduce theft risk.
Protect materials. Powder-coated steel resists corrosion, but chips happen—touch up exposed metal promptly. Add thin rubber isolators where dissimilar metals meet to reduce vibration and galvanic reaction. Keep debris out of latch interfaces; a quick blast of air beats fighting a stuck release.
Adopt a maintenance cadence:
After first install: re-torque fasteners after the first week or 100 miles of rough roads.
Monthly: inspect plates, anchors, and latch teeth; check for elongating holes or chipped coating.
After impacts or heavy braking: perform a push–pull test on each case; verify a positive latch click.
Seasonally: rinse road salt, apply a dry-film lubricant to moving parts, and recheck anchor torque.
Fabricating your own brackets? Use precise DXF files from Boco Custom to preserve hole patterns and tolerances for heavy duty tool mounting. Maintain proper countersinks, deburr all edges, and test-fit with a sacrificial panel before final install.
Finally, confirm compliance with local cargo securement rules and your insurer’s requirements. Professional tool organization only pays off if it stays put in every condition.
Benefits of a well-organized mobile workspace
A well-organized mobile workspace turns a vehicle into a reliable extension of your shop. When every tool has a labeled, locked-in position and ride-ready mounting, you move faster, make fewer mistakes, and protect your investment.
Speed is the immediate gain. With secure mobile tool storage, common tasks—like swapping a hole saw kit or grabbing a crimper—take seconds instead of minutes. Mount a Packout stack on low profile tool mounts near the side door, stage consumables on the bulkhead, and keep a dedicated bin for fasteners by trade. The result: less walking back and forth, fewer return trips, and more billable time on the task.
Safety improves as well. Heavy duty tool mounting prevents cases and loose tools from becoming projectiles under hard braking. Low-profile plates keep weight close to the vehicle body, supporting better handling and reducing tip hazards on uneven jobsites. Tie-in points and locking plates add another layer of secure vehicle tool storage when navigating rough access roads.
Organization protects your gear. Tools that don’t slide or rub last longer—no cracked levels, damaged meters, or dented nailers from transit shock. Powder-coated mounts resist corrosion and road grime, while foam inserts or labeled trays keep delicate instruments separated and ready.
Inventory control gets easier. A consistent layout lets you complete visual audits at the end of each day. Many teams standardize positions by trade—left wall electrical, right wall plumbing, rear door service kits. With instant-download DXF files, fabricators can cut custom plates that fit specific vans, service bodies, or shop carts, creating repeatable setups across a fleet.
You’ll also cut waste and weight. When every bin has a defined purpose, you carry exactly what’s needed, not three versions of the same driver bit. Better weight distribution reduces rattles and road noise, lowers fatigue, and can marginally improve fuel economy.
Practical benefits you’ll notice quickly:
Faster access to tools and consumables
Safer transport with less shifting and fewer distractions while driving
Reduced tool loss and damage, lowering replacement costs
Cleaner jobsite presentation that reinforces professional tool organization
Flexible workflows: swap a mounted stack from van to cart without repacking
Strong mobile workshop organization, built on secure mobile tool storage and purpose-built mounts, turns setup time into productive time—every day, on every job.
Standard shipping takes 5 to 7 business days. Express (2 to 3 days) and overnight options are available at checkout. Orders over $50 ship free.
Can I order online and pick up in store?
Yes. Select "Pick up in store" at checkout and choose your nearest location. Most orders are ready within 2 hours.
What if my order arrives damaged?
Contact us within 7 days of delivery with your order number and a photo. We'll arrange a replacement or refund, no return shipping required.
AI-Generated Content Disclosure
This blog post was created with the assistance of RankGPT, an AI-powered tool designed to generate high-quality, SEO-optimized content at scale.
As a small business embracing modern technology, we use AI to help us:
Produce informative articles more efficiently
Increase our online visibility through better performance in traditional search engines (like Google) as well as emerging AI-powered searches and answer engines
Reach more potential customers and grow our presence in a competitive digital landscape
By leveraging tools like RankGPT, we're able to publish valuable content more consistently and scale our efforts in ways that would otherwise take significantly more time and resources.
Important notes for readers:
While RankGPT helps create well-structured and relevant content based on current best practices, AI-generated posts are not always 100% accurate, complete, or free from errors.
The information, opinions, and perspectives expressed may not fully reflect the exact views, experiences, or official positions of Boco Custom, its team members, or the individuals involved in our business.
AI content should be viewed as a starting point or general resource—not as personalized professional advice, definitive facts, or a substitute for direct consultation with us or qualified experts.
We always recommend verifying important details independently, especially for decisions related to custom products, services, or any business matters.
We are committed to transparency and continually work to improve our content. If you have questions, feedback, or spot any inaccuracies, please reach out—we genuinely appreciate it!
Not only is this way overbuilt for the price with its solid, confident craftsmanship, I am completely convinced that these guys are the best around when it comes to the packout platform.
I like these, they are much more compact than what Milwaukee offers. I had them powder coated in silver vain and they look awesome. I love the bonus half rack they sent me. That’s the mark of a nice company.


Leave a comment