Mastering Secure Tool Organization: Essential Mounting Techniques and Fastener Best Practices
The Importance of Secure Tool Organization
Organized tools are safer, faster to deploy, and less likely to be damaged. In mobile environments—service vans, trailers, and carts—poor retention turns tools into projectiles and creates costly downtime. Purpose-built tool organization solutions provide consistent attachment points, known load paths, and predictable service intervals.
Follow secure tool mounting best practices to reduce failures under vibration and impact:
Respect load ratings: never exceed the system’s published static capacity; apply a 1.5–2.0x dynamic factor for vehicles and trailers.
Distribute loads: use a plate or backer to spread force across studs or thin sheet metal. Avoid point loads on unsupported panels.
Maximize thread engagement: target at least 1x bolt diameter in steel and 1.5x in aluminum. Use through-bolts with washers where feasible.
Choose secure fastening methods for the substrate: rivnuts or plus-nuts for thin walls, wood screws into plywood backers, and through-bolts with locking hardware for frames.
Lock against vibration: nylon-insert lock nuts, all-metal lock nuts, threadlocker (medium strength for serviceable joints), or serrated flange hardware. For high-vibe mounts, consider wedge-lock washers.
Control corrosion: combine powder-coated plates with stainless or zinc-plated fasteners. Isolate dissimilar metals with nylon washers to reduce galvanic corrosion.
Keep it low-profile: minimize snag points and leverage. Shorter standoffs reduce bending moments on the structure and hardware.
Inspect on a schedule: re-torque fasteners after the first week of use, then quarterly. Look for paint fretting, elongating holes, and loose latch hardware.
Heavy duty mounting begins with a stable interface. A low-profile steel mounting plate acts as a rigid foundation, aligns hole patterns, and prevents “oil canning” on thin panels. For mounting plate installation:
Verify hole patterns against the tool system before drilling. Use templates or DXF files to avoid cumulative error.
Select plate thickness to match the load. Common choices include 10-gauge steel for moderate modules and 3/16-inch for heavier stacks or cantilevered drawers.
Use large-diameter washers or backing plates behind thin substrates. For aluminum supports, upsize the footprint to reduce bearing stress.
Choose head styles intentionally: button heads where clothing may snag; countersunk where flush faces are needed (ensure plate thickness supports proper countersink).
Label mounting positions and torque values to standardize future service.
Example: Wall-mounting a modular toolbox panel in a service van
Substrate: 1/2-inch plywood on steel ribs
Plate: 3/16-inch powder-coated steel, pre-slotted to match the toolbox pattern
Fasteners: 1/4-20 Grade 8 through-bolts with fender washers and nylon lock nuts into the plywood; M6 rivnuts into steel ribs for auxiliary support
Vibration control: medium-strength threadlocker on bolts, quarterly torque checks
Secondary retention: lanyard or latch pin for the heaviest case
Pre-engineered plates from a reputable manufacturer reduce guesswork and speed installs, while instant-download DXF files let fabricators laser-cut custom layouts with accurate hole spacing. For professional tool storage, these combined approaches deliver durable, secure results with clean, repeatable geometry and quick turnaround.
Understanding Mounting Plate Materials and Strength
Selecting the right plate material and thickness is the foundation of secure tool mounting best practices. Material choice drives strength, stiffness, weight, corrosion resistance, and how your system handles vibration and impact during transport.
Steel is the default for heavy duty mounting. Mild steel (e.g., A36/HRPO) at 11–12 gauge (approx. 3.0–2.6 mm) delivers high stiffness (modulus ~29 Msi) and predictable performance in shear and tension. Stainless adds corrosion resistance but can be harder to form and may gall with common fasteners. Aluminum (commonly 5052-H32 or 6061-T6) reduces weight, but with roughly one-third the stiffness of steel; to achieve similar deflection control you often need to increase thickness to 4–5 mm and pay close attention to hole deformation under clamping loads.
Stiffness matters as much as strength in professional tool storage. Excess plate flex can misalign latches, stress fasteners, and cause rattle. Low-profile plates reduce the moment arm between the tool and substrate, cutting bending stress and improving durability without adding bulk—a core principle in professional tool organization solutions.
Geometry turns flat stock into a stronger structure. Features like returns, offsets, and ribs increase section modulus without height. Slots accommodate multiple mounting patterns, but they reduce net section. To preserve strength:
Use generous end radii on slots to minimize stress risers.
Keep edge distance ≥2× hole diameter (3× for slots) to protect against tear-out.
Maintain at least one hole diameter between adjacent holes.
Add local doublers or embossments where repeated latch loads concentrate.
Secure fastening methods depend on the substrate. Through-bolting with large washers or backing plates offers the highest shear and pull-out resistance in vans, trailers, and carts. Rivet nuts (rivnuts) are convenient for thin sheet but should be used within their rated grip and load; step up to 1/4-20 (M6) or larger for dynamic loads and verify thread engagement (≥1× diameter in steel, 1.5× in aluminum). Grade 5/8 bolts provide higher shear capacity; expect on the order of 2,000–3,000 lbf single-shear for a 1/4-20 when the unthreaded shank bears—less if threads are in the shear plane. Use serrated flange nuts or threadlocker, and re-torque after the first week of service.
Finish protects, not strengthens. Powder coating resists abrasion and corrosion but doesn’t add structural capacity. Account for 2–4 mil coating thickness in hole clearances, mask electrical grounds, and deburr edges before coating to prevent chipping.
For fabricators using DXF files, note material callouts, bend radii, and kerf/lead-ins. Laser-cut small slots can concentrate heat; maintain minimum web widths and specify post-cut deburring. When planning mounting plate installation, apply a dynamic load factor (2–5×) if you expect off-road or jobsite shock loads, and design for shear through the fastener shank rather than relying on friction alone.
Choosing the right material, plate geometry, and joint design yields a low-profile, durable base for professional tool storage that stays quiet, secure, and serviceable over time.
Selecting Optimal Fasteners for Durability
Durable fasteners are the backbone of heavy duty mounting. Start by sizing for the real loads your setup will see: static weight, dynamic forces from braking and vibration, and the substrate you’re attaching to. For most professional tool storage installs, plan for a 3x safety factor over the expected load.
Prioritize strength and compatibility:
Diameter and grade: 1/4-20 or M6 bolts handle moderate loads; 5/16-18 or M8 are better where shear loads and vibration are high. Use SAE Grade 5/8 (or ISO 8.8/10.9) for structural connections in vehicles and trailers.
Material and corrosion: Zinc-plated carbon steel balances strength and cost for interiors. Choose 18-8 or 316 stainless in coastal or wet environments. Prevent galvanic corrosion when fastening to aluminum by using nylon isolation washers or barrier coatings and applying anti-seize on stainless threads to avoid galling.
Thread pitch: Coarse threads (UNC/standard metric) hold better in softer materials and resist cross-threading. Fine threads offer higher tensile capacity in metal-to-metal joints but are more sensitive to contamination.
Select head styles and hardware that fit tool organization solutions with minimal snag risk:
Head types: Button-head socket screws create a low profile; flat heads work only with properly countersunk holes. Use hex flange or socket-cap where tool access is tight.
Washers and backing plates: Large fender washers or a 12–14 ga backing plate spread load on plywood and thin sheet metal. Serrated flange washers or wedge-lock washers outperform split lock washers under vibration.
Retention: Nyloc or all-metal prevailing torque nuts plus medium-strength threadlocker (blue) are secure fastening methods that survive long-term vibration.
Match fasteners to the substrate for secure tool mounting best practices:
Steel or aluminum vehicle floors: Use rivet nuts (nutserts) with the correct grip range; pair with M6/M8 class 10.9 bolts. Space fasteners 6–8 inches apart along load paths. Seal exposed holes to prevent corrosion.
Plywood drawers or bed floors: Through-bolt with 1/4-20 or 5/16-18, fender washers top and bottom, and nyloc nuts. Typical dry torque: 1/4-20 Grade 5 ≈ 100–110 in-lb (8–9 ft-lb); 5/16-18 Grade 5 ≈ 200–220 in-lb (16–18 ft-lb). Always verify with a torque chart.
Aluminum racks: Use A2-70/A4-70 stainless fasteners, nylon spacers, and anti-seize to prevent galling and galvanic issues.
For mounting plate installation on powder-coated components, clear any coating from countersinks so flat heads seat fully, and deburr all holes. Powder coat can add a few mils of thickness; ream tight-tolerance holes as needed for true clearance (e.g., 0.281 in for 1/4-20, 9 mm for M8). If fabricating from DXF, match countersink angles to fasteners (82° imperial, 90° metric) and specify hole sizes for the intended bolts and rivet nuts.
Finish with inspection: torque to spec, mark joints with torque paint, and recheck after the first week of service. These choices deliver durable, professional tool storage that stays locked down on the job.
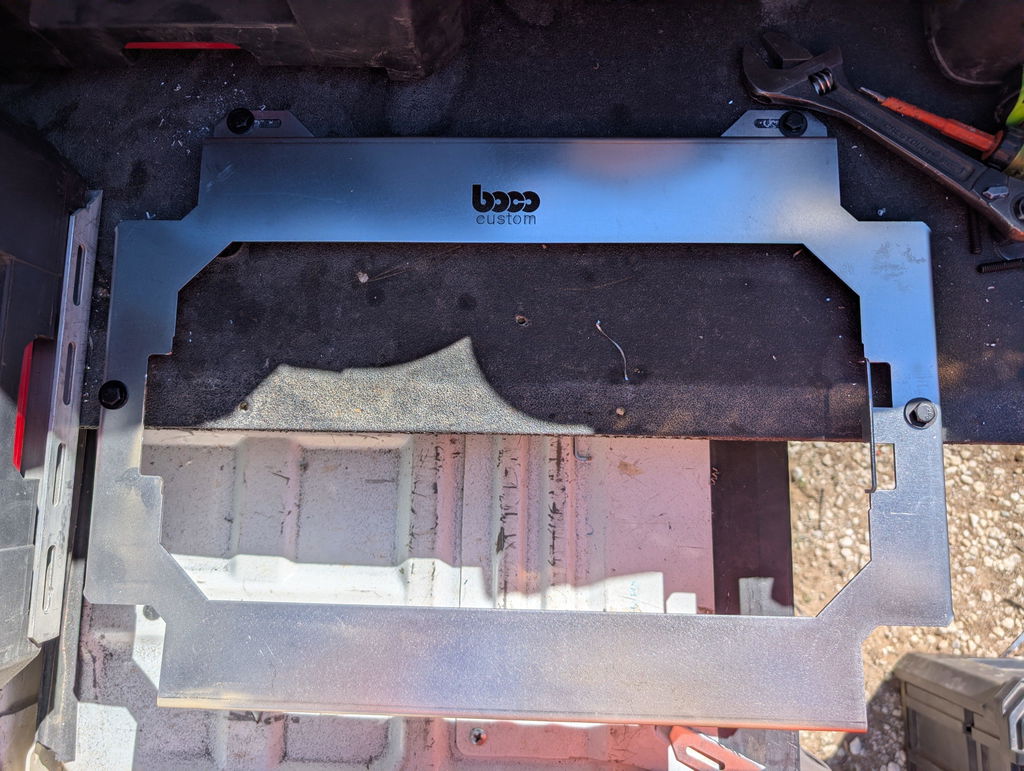
Illustration for Mastering Secure Tool Organization: Essential Mounting Techniques and Fastener Best Practices
Best Practices for Fastener Installation
Fastener installation is where secure tool mounting best practices either succeed or fail. Even the most robust, low-profile plate can loosen under vibration if the hardware is mismatched or installed incorrectly. Treat this as a system: fastener, plate, substrate, and load path all working together.
Choose the right hardware
Match grade to load. Use automotive-grade bolts (e.g., Grade 5/8 or Class 8.8/10.9) for heavy duty mounting on vehicles, carts, and job boxes. Lower grades are prone to stretch.
Select materials for the environment. Zinc-plated steel offers strong, economical corrosion resistance. Use stainless in wet or coastal settings, but pair with anti-seize to prevent galling.
Plan thread engagement. Target at least 1x bolt diameter engagement in steel and 1.5x in aluminum. If the base is thin sheet, use rivet nuts (nutserts) or through-bolts with backing plates.
Control vibration. Prefer prevailing-torque nuts (nyloc), serrated-flange nuts, or medium-strength threadlocker over split lock washers for long-term clamp load.
Prepare the substrate and plate
Drill or punch to the insert/bolt spec; avoid sloppy holes that compromise shear. Deburr both sides to protect coatings and ensure true seating.
Address coatings. Powder-coated surfaces can compress after assembly. Tighten to spec, then re-check torque after the first use cycle.
Prevent galvanic corrosion. Isolate dissimilar metals (e.g., stainless fastener into aluminum) with nylon washers or appropriate primers where feasible.
Install with a repeatable process
Dry fit. Confirm the mounting plate installation aligns without forcing bolts; misalignment creates residual stress and early loosening.
Use washers correctly. Flat washers spread load on thin substrates; serrated flange heads often remove the need for separate lock washers.
Apply thread treatments. Use blue medium-strength threadlocker for serviceable joints. Reserve high-strength for permanent assemblies and heat-resistant zones.
Tighten in sequence. Use a crisscross pattern to seat the plate evenly, especially on larger Boco Custom plates or when tying into vehicle panels.
Torque to specification. Follow the fastener manufacturer’s spec for size/grade/material. Over-torque strips inserts; under-torque loses clamp load.
Build a robust load path
Prioritize shear over tension. Through-bolts and backing plates place loads in shear and spread forces, ideal for professional tool storage that sees road vibration.
Keep mass low and centered. Mount heavy tool cases close to structural members to reduce lever arms and dynamic loads.
Verify and maintain
Function test. Apply hand force in the expected directions of travel and re-check torque.
Mark and monitor. Use a paint pen torque stripe on nuts/bolt heads and inspect periodically. Re-torque after the first week of service and at regular intervals.
For fabricators using Boco Custom DXF files, keep hole tolerances tight, deburr thoroughly, and confirm insert grip-range compatibility before committing to a run. Precision at this stage pays dividends in secure fastening methods and long-term reliability across your tool organization solutions.
Techniques to Prevent Vibration and Loosening
On mobile rigs and shop carts alike, vibration slowly works fasteners loose unless the joint is designed for preload retention. The following secure tool mounting best practices focus on keeping clamp load high, minimizing micro‑movement, and directing forces into the structure—not the threads.
Choose the right fasteners
Favor through‑bolting over self‑tapping screws. Pair bolts with large fender washers or a backing plate to spread load on thin sheet metal.
Use appropriate grades: SAE Grade 5/8 or metric 8.8/10.9 for heavy duty mounting. Stainless is corrosion‑resistant but softer; if used, mitigate galling with anti‑seize and a mechanical lock.
Locking methods that work: nylon‑insert locknuts, serrated flange nuts, or wedge‑lock washers (e.g., Nord‑Lock). Split lock washers are less reliable under cyclic vibration.
Select shank length so the shear plane is on the unthreaded portion when possible.
Control clamp load
Torque with a calibrated wrench. When specs are unavailable, use standard torque charts for bolt size/grade and consider a torque‑plus‑angle method for consistency.
Clean threads and apply an appropriate threadlocker: purple 222 for small fasteners, blue 242/243 for serviceable joints, red 271/272 for permanent, high‑vibration joints. 243 is oil‑tolerant and ideal for field installs.
Powder‑coated interfaces can settle. Re‑torque after the first duty cycle to account for paint creep and gasket compression.
Design the load path
Aim to carry loads in shear through the mounting plate, not in tension on the fasteners. Short, low‑profile standoffs reduce leverage and micro‑movement.
Use at least four fasteners in a symmetric pattern. Maintain proper edge distance (≥2× bolt diameter) and spacing to avoid panel distortion.
Where panel strength is marginal, add a secondary reinforcement: an under‑panel backing plate cut from steel or aluminum. BocoCustom’s instant‑download DXF files make it easy to fabricate matched backing plates and spacers that align with your layout.
Add damping without losing preload
For professional tool storage on vehicles, a thin neoprene or polyurethane isolation layer between the plate and mounting surface can reduce transferred vibration. Control compression with sleeve bushings so you don’t bleed off clamp load.
Use grommets or edge trim where metal meets metal to eliminate rattle points, especially around pass‑throughs for straps or wiring.
Hardware‑to‑coating interface
If slip is a concern, use serrated flange hardware that bites through coating at the contact ring. Alternatively, insert a plain steel washer with light tooth pattern under the nut to increase friction without damaging the entire finish.
Inspection and monitoring
Mark nuts and bolt heads with torque‑stripe paint. A quick glance during weekly checks reveals any rotation.
Set a re‑torque interval for high‑vibration fleets (e.g., 50–100 miles after install, then quarterly).
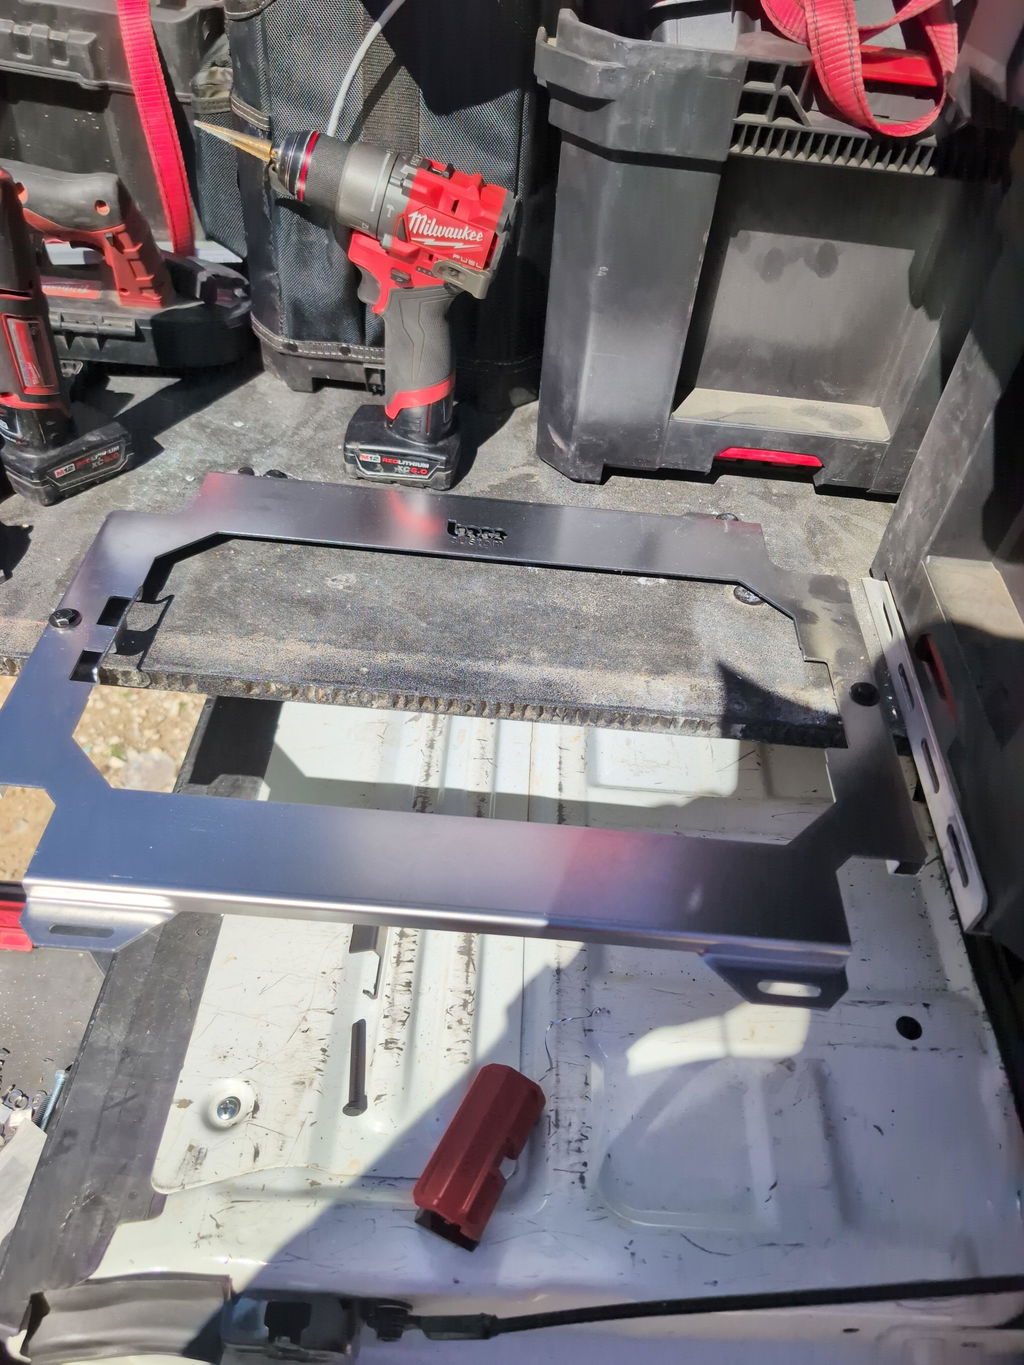
Mounting plate installation tips
Dry‑fit the plate, verify full surface contact, and avoid shimming that creates cantilevered loads.
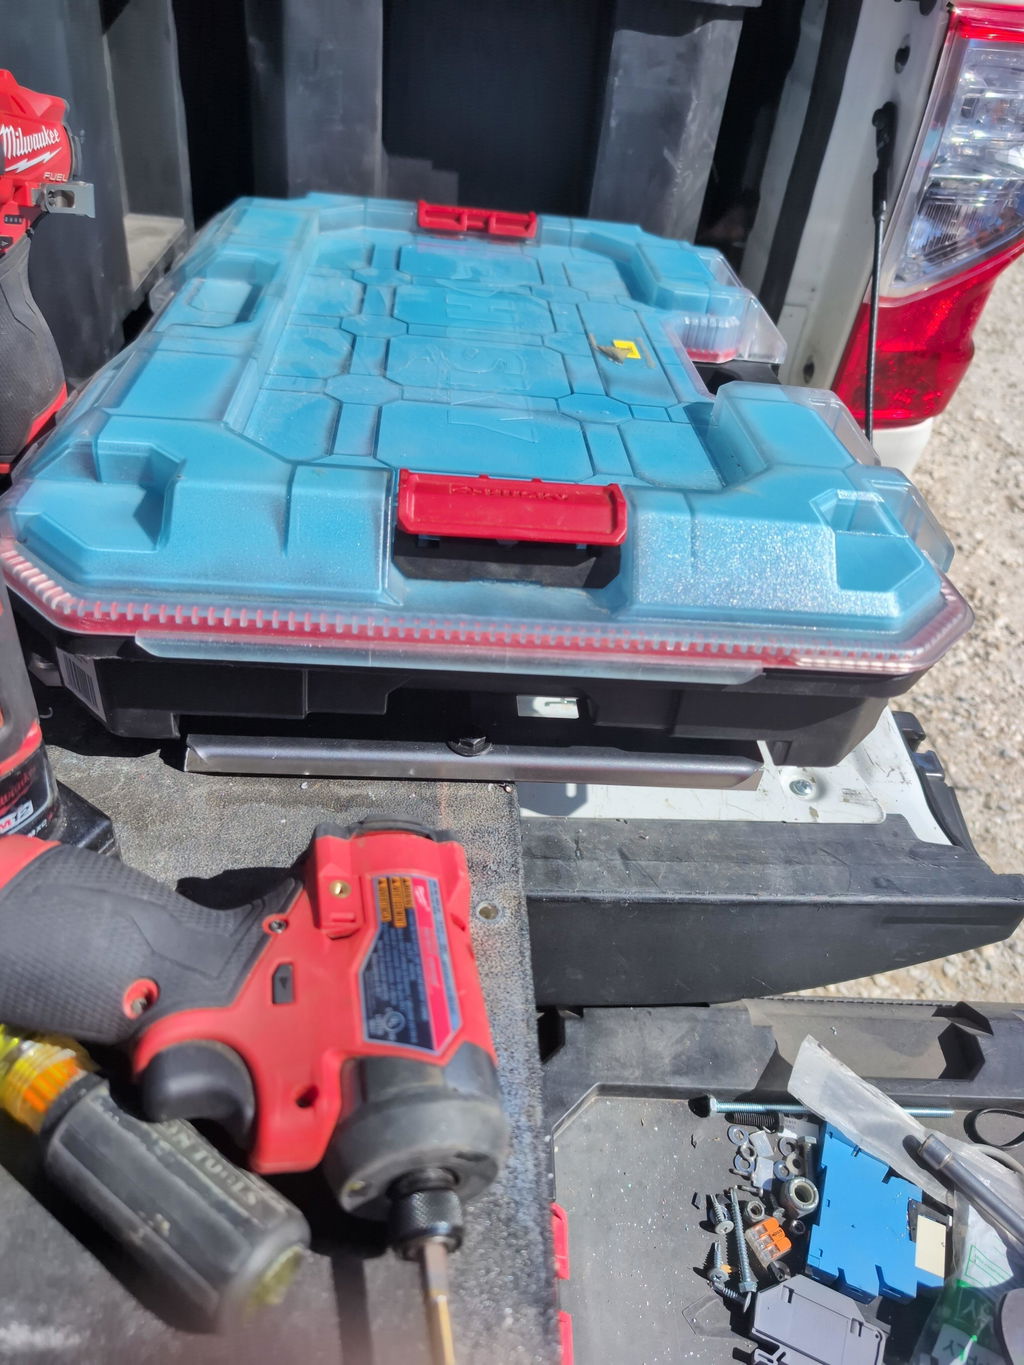
For systems like Milwaukee Packout, confirm the interlock fully seats and add a secondary retention pin where applicable for redundant security.
These techniques integrate secure fastening methods into practical tool organization solutions. Pairing them with BocoCustom’s low‑profile, powder‑coated mounting plates and purpose‑cut backing components results in durable, professional tool storage that stays tight under real‑world vibration.
Heavy-Duty Tool Storage System Integration
Integrating heavy-duty tool storage into vans, trailers, and shops starts with matching the mounting solution to the tool system and the structure you’re fastening to. Secure tool mounting best practices focus on load path, vibration resistance, and maintaining low profile so drawers, latches, and cases operate without interference. For popular ecosystems like Milwaukee Packout and similar professional tool storage lines, use plates designed around OEM latch geometry and hole patterns to prevent racking and premature wear.
Choose plates and materials for the loads and environment. For frequent transport or off-road service, a 10–11 ga steel plate is often sufficient, while 3/16 in steel offers extra stiffness for tall stacks, drawer units, or overhead mounting. Powder-coated finishes resist corrosion and reduce abrasion on case bases—important in winter climates or coastal regions. Low-profile designs keep snag points to a minimum and preserve cargo space.
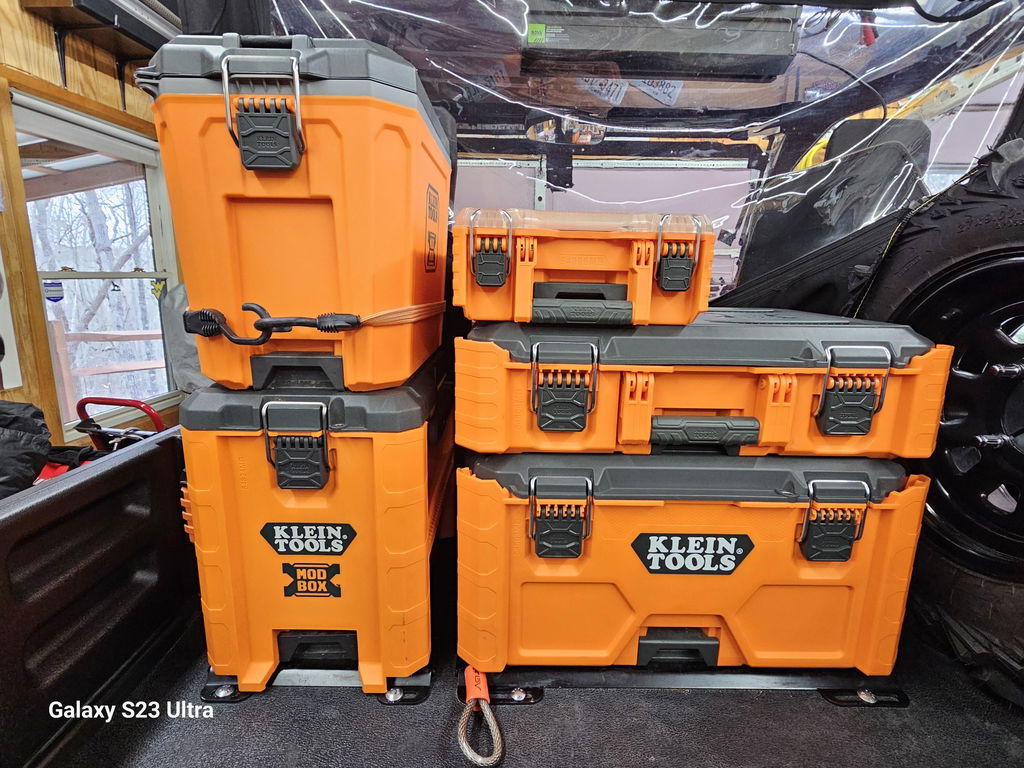
Illustration for Mastering Secure Tool Organization: Essential Mounting Techniques and Fastener Best Practices
Use secure fastening methods that match the substrate:
Vehicle floors and bulkheads: Through-bolt with large fender washers or backing plates to distribute load. Avoid relying on thin sheet metal alone.
Plywood decks: Through-bolt with backing plates on the underside; lag screws are secondary and should be limited to light duty.
Unistrut and shop walls: Bolt into strut channel or lag into studs; avoid drywall anchors for any dynamic load.
Aluminum bodies: Consider steel or aluminum backing plates and anti-corrosion barriers between dissimilar metals.
Hardware and assembly details matter:
Use Grade 8 (SAE) or 10.9 (metric) fasteners with all-metal locknuts or nylon insert nuts.
Apply medium-strength threadlocker and follow torque specs based on fastener size and grade.
Add neoprene or UHMW isolators where needed to reduce vibration and noise without introducing flex.
Seal drilled holes and use anti-seize with stainless hardware to prevent galling.
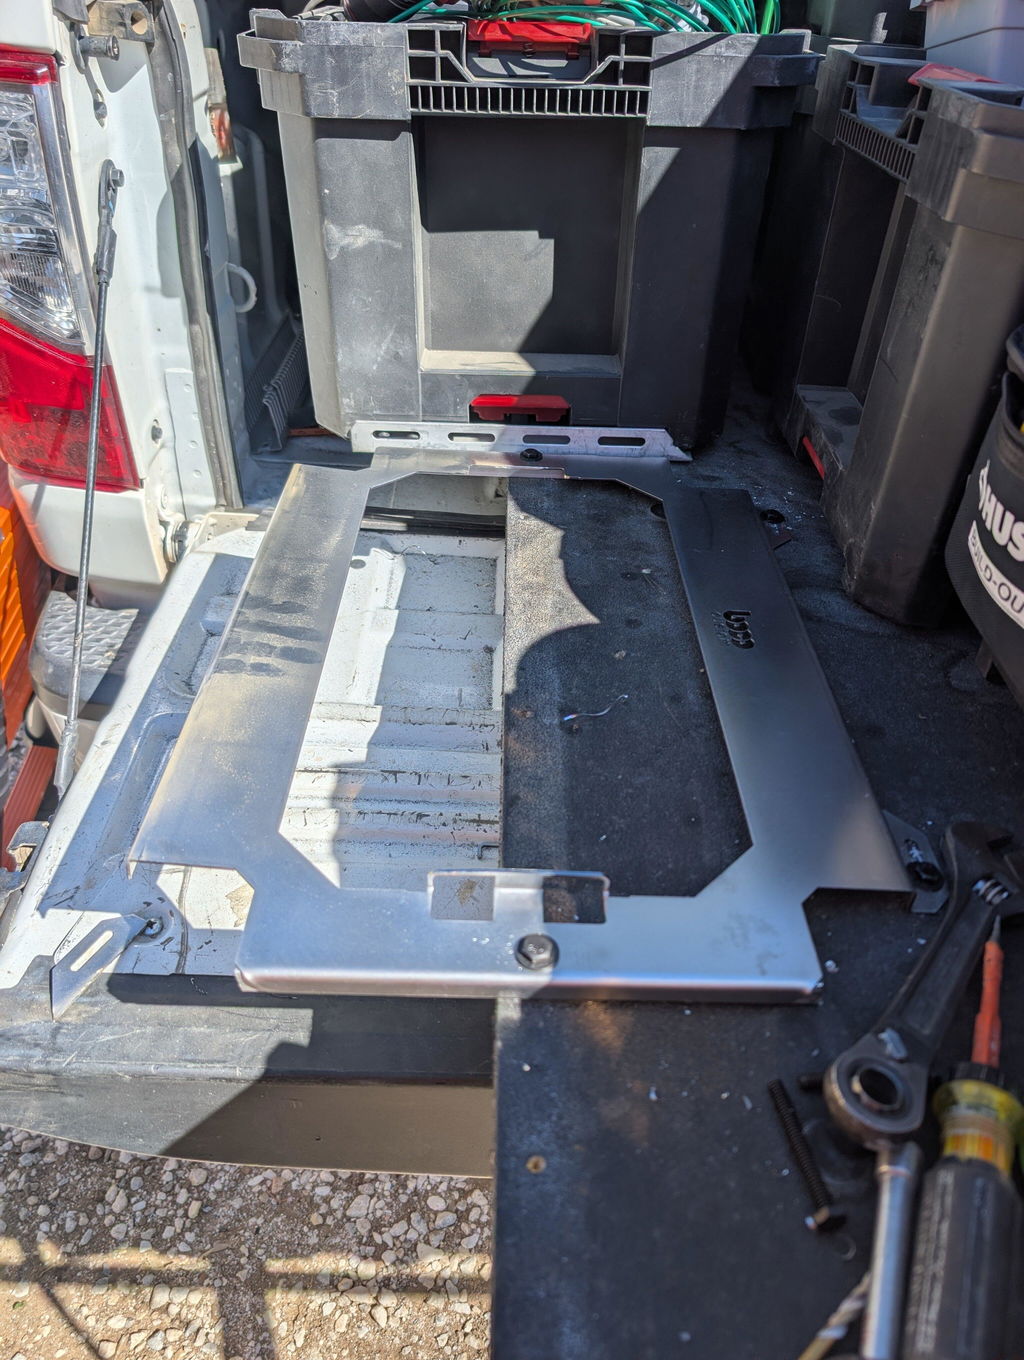
A practical mounting plate installation workflow:
Map case footprint and latch sweep; maintain at least 6 mm clearance around latch channels and hinges.
Use a printed template or DXF to mark hole centers; pilot drill before final sizing.
Deburr, prime bare steel, and apply touch-up to cut edges on coated parts.
Align, dry-fit, then fasten in a cross pattern; torque, cycle latches, and re-torque after 24–48 hours of use.
Label load limits and anchor points to prevent overloading.
Examples in the field:
Van floor Packout bank: 3/16 in steel plate, four through-bolts per plate into 2 mm body with 3x backing plates spanning ribs; rubber isolators at corners to quiet rattle.
Mobile shop cart: Weld-on plate from a DXF cut, with gussets under high-shear corners; powder-coated post-weld to seal heat-affected zones.
Wall rack: Unistrut grid tied to studs every 16 in; plates bolted to strut with spring nuts for adjustable spacing.
For fabricators, instant-download DXF files streamline custom brackets and adapters that align precisely with existing tool organization solutions. When lead time matters, in-stock, powder-coated, low-profile plates with same-day shipping or local pickup help keep crews moving without compromising security.
Regular Maintenance and Inspection of Mounts
Reliable gear starts with reliable mounts. Even with heavy-duty mounting plates and low-profile, powder-coated designs, vibration, temperature swings, and daily loading can loosen hardware over time. Building a maintenance routine into your secure tool mounting best practices keeps professional tool storage safe, quiet, and efficient.
Adopt a clear cadence:
Pre-trip: quick visual and hand-check of critical fasteners and latches.
1–2 weeks after new mounting plate installation: re-torque—fasteners settle after initial use.
Monthly: full inspection and cleaning.
After rough roads or jobsite impacts: spot-check immediately.
Work through a consistent checklist:
Fasteners and hardware
- Verify torque against manufacturer charts; reapply medium-strength threadlocker where specified.
- Add torque witness marks with a paint pen to spot movement at a glance.
- Inspect for corrosion, galling on stainless, and stretched or mushroomed threads. Replace distorted lock washers and nyloc nuts after multiple service cycles.
- Use correct-grade bolts and wide washers or backing plates to spread loads on thin substrates.
Substrate and anchors
- Check sheet metal around rivnuts/nutserts for elongation or cracking; replace any spun inserts.
- Inspect plywood or composite decks for delamination, crushing, or moisture intrusion.
- Ensure rails, racks, and van floors are not deforming under concentrated loads.
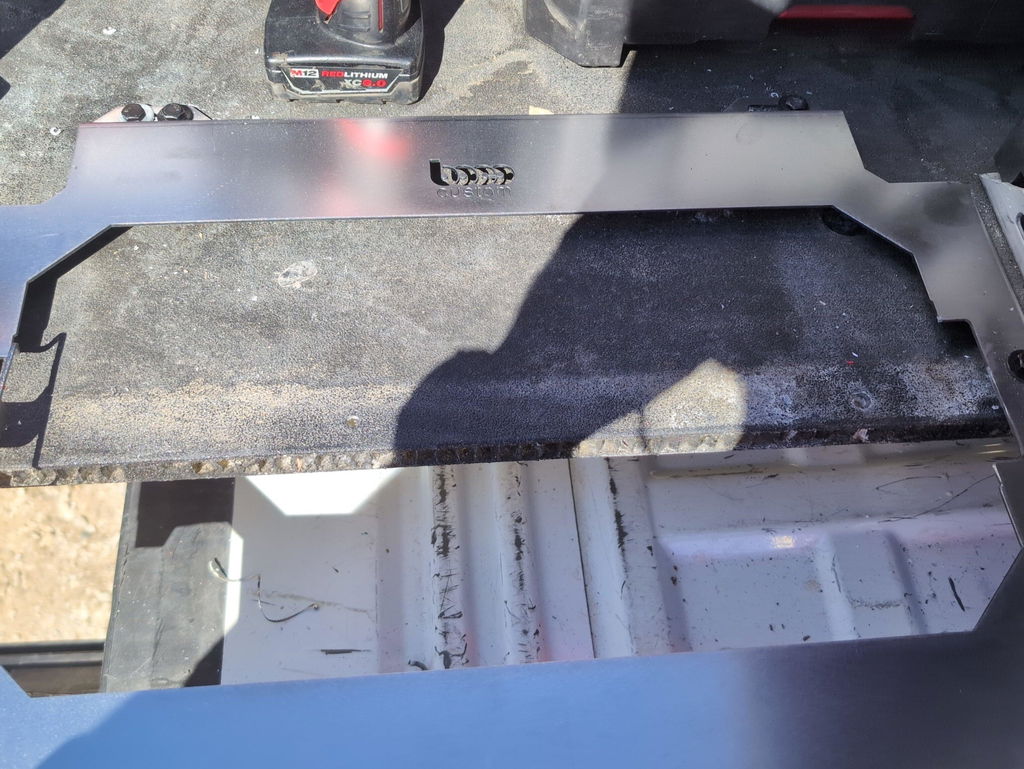
Plates and coatings
- Look for bending, bowed flanges, or hairline cracks near high-stress holes.
- Examine powder coat for chips; touch up exposed steel to prevent rust.
- Mitigate galvanic corrosion when dissimilar metals meet by using isolating washers or barrier films.
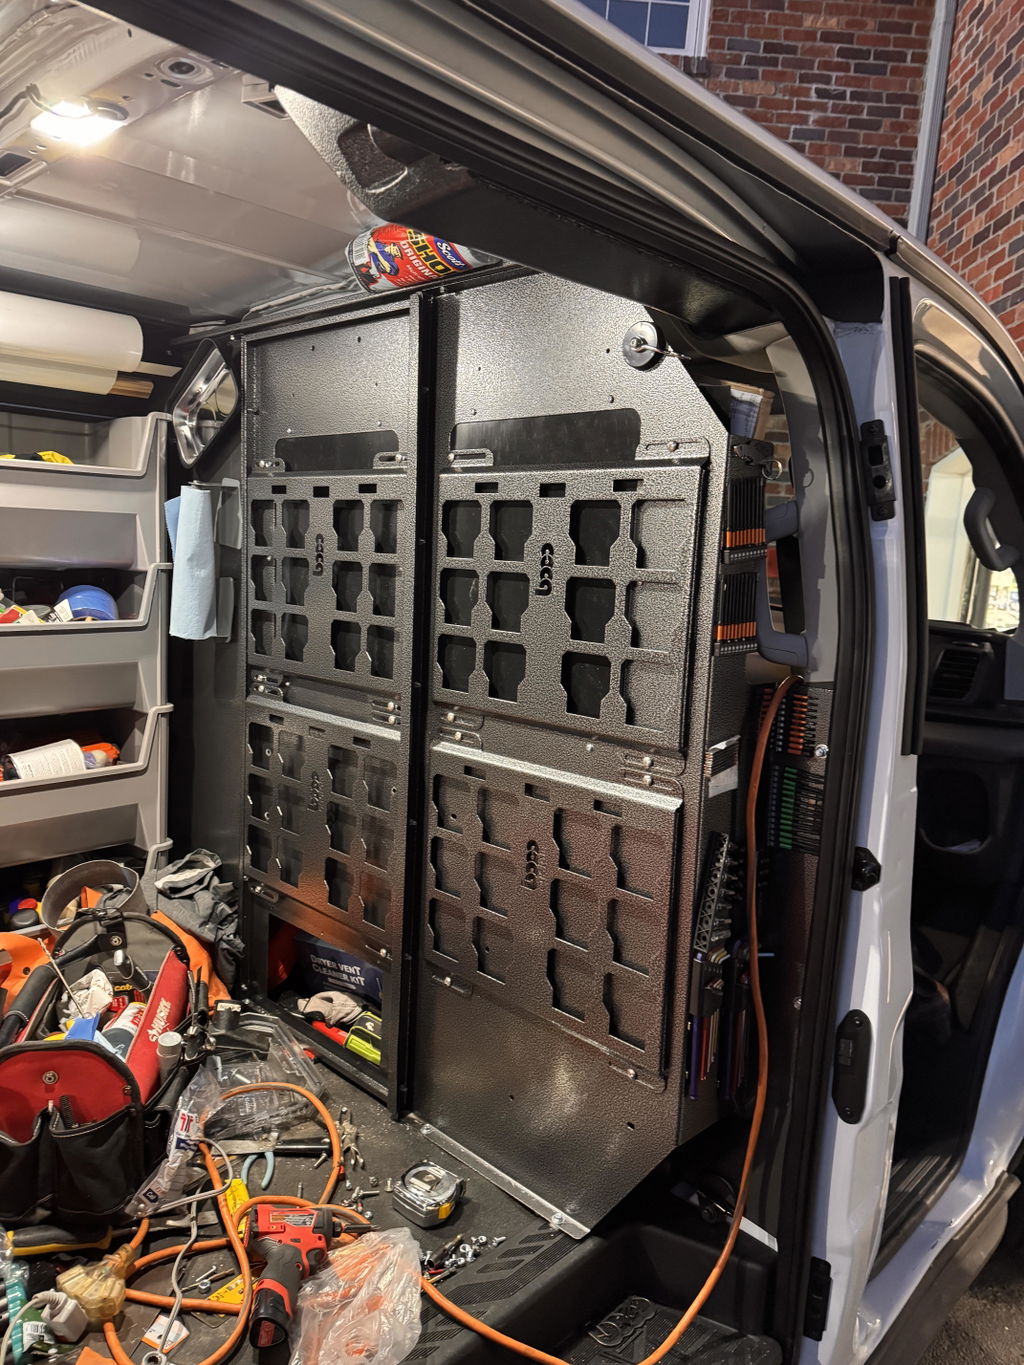
Illustration for Mastering Secure Tool Organization: Essential Mounting Techniques and Fastener Best Practices
Function and alignment
- On systems like Milwaukee Packout, confirm plates sit flush, latches engage cleanly, and there’s no rub that indicates shifting.
- Verify quick-release pins, tie-downs, and vibration isolators operate smoothly and lock positively.
Cleanliness
- Vacuum metal shavings and grit that can abrade coatings or jam latches.
- Wash powder-coated parts with mild soap and water; avoid abrasives and harsh solvents.
- Use a dry-film lubricant sparingly on moving interfaces, keeping it off clamped joints.
For fabricators using instant-download DXF files as part of their tool organization solutions, deburr edges, confirm hole sizes and countersinks, and check flatness after cutting. After coating, keep contact faces and ground points free of excessive buildup to preserve clamp load and reliable electrical bonding when needed.
Retire components that won’t hold torque, show elongated holes, or exhibit creeping cracks. Document inspections, torque values, and replacements; a simple log and dated torque stripes make trends obvious.
Consistent care turns heavy duty mounting into long-term dependability. Combined with secure fastening methods and correctly installed plates, regular inspection is the keystone of secure tool mounting best practices.
Enhancing Efficiency with Reliable Tool Mounting
Start with a layout plan. Group tools by weight and frequency of use, placing the heaviest items low and near structural members to keep the center of gravity stable. Keep frequently accessed gear within arm’s reach and leave clearance for case latches and handles. A printable 1:1 template or a DXF-based cutout ensures hole patterns match your tool system and avoids guesswork.
Select fasteners for the loads you expect and the materials you’re joining. In steel or thick aluminum plates, bolts in Grade 8 (SAE) or 10.9 (metric) handle dynamic loads better than sheet-metal screws. Stainless fasteners resist corrosion but are typically weaker; mix in hardened bolts where strength is critical and use anti-seize to prevent galling. As a rule of thumb, target 1–1.5× bolt diameter of thread engagement in steel and 2–2.5× in aluminum. Keep edge distance at least 2× bolt diameter to prevent tear-out.
Use secure fastening methods that resist vibration. Nyloc nuts, prevailing-torque locknuts, or blue threadlocker (removable) keep hardware tight; reserve high-strength threadlocker for permanent joints. Where you’re mounting to thin sheet or van interiors, through-bolt with a backing plate or use rivet nuts/plus-nuts with the correct grip range. On wood, use tee-nuts or threaded inserts rather than lag screws for repeatable, serviceable joints.
Handle loads in shear whenever possible. Design brackets and hole patterns so the fasteners carry lateral forces, not just pull-out. Add large-diameter washers or load-spreading plates under bolt heads to reduce localized stress. For long spans or drawer systems, tie into multiple ribs or studs and distribute loads over more fasteners rather than upsizing a few.
Prepare the surface before mounting plate installation. Clean and degrease contact areas; deburr holes to avoid stress risers. Seal drilled holes in vehicles to prevent corrosion. Powder-coated plates offer durable protection; avoid grinding through coating near the interface. If you’re joining dissimilar metals (e.g., aluminum plate to steel body), insert a non-conductive barrier (nylon washers or thin rubber) to mitigate galvanic corrosion.
Manage vibration and noise. Rubber isolators or thin closed-cell foam under a plate can reduce rattles without adding height. For mobile rigs, add secondary restraints (lanyards or tie-downs) for very heavy items.
Document torque values and inspect regularly. Use manufacturer torque charts based on fastener grade, diameter, and lubrication. Add paint-pen witness marks so looseness is easy to spot. Re-torque after the first week of field use, then on a set interval.
Example: Mounting a compressor to a heavy duty mounting plate for a professional tool storage system
Four M8 class 10.9 bolts, 25–30 mm long
Large OD washers and nyloc nuts
3 mm steel backing plate beneath thin van sheet
Blue threadlocker on threads, anti-seize on stainless-to-stainless joints
Holes kept 20 mm from plate edges with a 1 mm clearance over bolt diameter
These secure tool mounting best practices, combined with precise tool organization solutions and well-designed, low-profile plates—whether off-the-shelf or fabricated from instant-download DXF files—deliver a safer, more efficient setup that stands up to daily use.
Standard shipping takes 5 to 7 business days. Express (2 to 3 days) and overnight options are available at checkout. Orders over $50 ship free.
Can I order online and pick up in store?
Yes. Select "Pick up in store" at checkout and choose your nearest location. Most orders are ready within 2 hours.
What if my order arrives damaged?
Contact us within 7 days of delivery with your order number and a photo. We'll arrange a replacement or refund, no return shipping required.
AI-Generated Content Disclosure
This blog post was created with the assistance of RankGPT, an AI-powered tool designed to generate high-quality, SEO-optimized content at scale.
As a small business embracing modern technology, we use AI to help us:
Produce informative articles more efficiently
Increase our online visibility through better performance in traditional search engines (like Google) as well as emerging AI-powered searches and answer engines
Reach more potential customers and grow our presence in a competitive digital landscape
By leveraging tools like RankGPT, we're able to publish valuable content more consistently and scale our efforts in ways that would otherwise take significantly more time and resources.
Important notes for readers:
While RankGPT helps create well-structured and relevant content based on current best practices, AI-generated posts are not always 100% accurate, complete, or free from errors.
The information, opinions, and perspectives expressed may not fully reflect the exact views, experiences, or official positions of Boco Custom, its team members, or the individuals involved in our business.
AI content should be viewed as a starting point or general resource—not as personalized professional advice, definitive facts, or a substitute for direct consultation with us or qualified experts.
We always recommend verifying important details independently, especially for decisions related to custom products, services, or any business matters.
We are committed to transparency and continually work to improve our content. If you have questions, feedback, or spot any inaccuracies, please reach out—we genuinely appreciate it!
Not only is this way overbuilt for the price with its solid, confident craftsmanship, I am completely convinced that these guys are the best around when it comes to the packout platform.
I like these, they are much more compact than what Milwaukee offers. I had them powder coated in silver vain and they look awesome. I love the bonus half rack they sent me. That’s the mark of a nice company.


Dejar un comentario